


1 Introduction
When you want to record your games, screen or webcam, OBS Studio (Open Broadcaster Software) is the number one software for the task. Yes, we are talking about OBS, the most used streaming software on the Internet.
OBS is a free streaming and recording software, available for Windows, Mac and Linux, and is one of the best options to record your games thanks to the number of the features available. It allows you to record your webcam, games, podcasts, and a lot of different audio tracks independently, something very useful if later you want to edit the video to upload it to your YouTube channel.
In this article, you will learn how to record your screen, games, audio and webcam, in the best quality, using OBS Studio. Moreover, we will also show you the best settings to record with OBS.
2 How to use OBS to record
A feature that many may not know about OBS, the most used software in terms of streaming on Twitch and YouTube, is that it allows you to record your screen, game or webcam in an easy and uncomplicated way.
2.1 Install OBS
First thing is first, go to https://obsproject.com in your web browser and choose your client, depending on your operating system. You will see the download as soon as you open the website. OBS is compatible with Windows, macOS 10.13+ and Linux.
Open the installation file you've just downloaded and start the installation process. Click "Next", "Next", select the destination folder and then click "Install" to start the installation. As soon as the installation is completed, click "Finish" and OBS Studio software will start immediately.
The first time you open OBS Studio after completing the installation process the software is automatically configured. If you are streaming, click "Optimize for streaming" and click next. If you have a good computer, choose a resolution of 1920x1080 and 60FPS and then choose the streaming platform you want, in this case YouTube. Connect your YouTube account when prompted and you are ready to add the sources and scenes to your stream.
2.2 Create a scene and add a source
If you want to record with OBS the first thing you have to do is to create a new scene, and then add the sources you want to record.
To do so, go to the Scenes panel, located at the bottom left corner. Press "+" and create a new scene. You can have several sources inside every scene, so now we will start adding some sources.
To add a source to share your screen, game or webcam, go to the Sources panel, at the bottom next to the "Scenes'' one, and click "+". Now choose an option from the drop down list: "Game Capture", "Screen Capture", "Video Capture Device" or "Window Capture".
TIP: If you want to record just your gameplay or your webcam, we advise you to create a new scene for each one. You can create several scenes in OBS and this way it will be more organized.
2.3 Start Recording
To start recording, click the "Start Recording" button in the bottom right corner of OBS, in the "Controls" section and just below the "Start Streaming" button. To stop recording, click the "Stop Recording" button.
3 How to record with OBS
There are several applications to record your screen, webcam, microphone, etc. but the most complete is OBS as it allows you to record your monitor, games and audio in different tracks.
Recording with OBS is very simple, just configure the sources you want to record and press the "Start Recording" button.
3.1 How to record a screen with OBS
To record your screen, add a source in the "Sources" > "+" > "Display Capture" area.
Next, name the source you just created and choose which monitor you want to record from in the drop-down menu.
If you have a desktop PC, with, for example, two monitors, you will get Display 1 and Display 2. If, on the other hand, you are on a laptop, Display 0 will be the laptop screen and Display 1 the external monitor.
If everything goes well, you will see your chosen display in OBS. To record, just click "Start Recording" and "Stop Recording" when you want to stop recording.
3.2 How to record a webcam with OBS
If you want to record your webcam, add a source in "Sources" > "+" > "Video Capture Display" (this option is also used to add a video capture device).
Give it a name, for example "webcam", and click OK. It will then appear on the screen and you will be able to adjust its size.
Our recommendation is that if you want to record your webcam in full screen, create this source in a separate scene.
You will see your webcam on the screen and to record, just click "Start Recording" and "Stop Recording" when you want to stop recording.
3.3 How to record microphone audio with OBS
By default, OBS recognises your main microphone and set it up, but if you want to add another one manually, follow the steps below:
Go down to "Sources" > "+" > "Audio Input Capture". Give it a name, e.g. "microphone" and click OK. After that, choose your microphone from the drop-down list.
To record, just click "Start Recording" and "Stop Recording" when you want to stop recording.
3.4 How to record internal audio with OBS
Also by default, OBS configures your sound card to record all audio from your PC. To record internal audio (audio from your games, windows sounds, videos you are watching...) you should also add a new audio source.
Go down to "Sources" > "+" > "Audio Output Capture". Give it a name, e.g. "Audio PC" and click OK. Next, select the sound card you want to record from the drop-down.
To record, just click "Start Recording" and "Stop Recording" when you want to stop recording.
3.5 How to use OBS to record games
If you want to record your PC games, you can do it very easily. As in the previous cases, simply add a new source.
Go down to "Sources" > "+" > "Game Capture" and click OK. Next, type a name for the source, being a game, we advise you to put the name of the game, and click OK.
In the next window, we configure more options:
- Mode - Choose "Capture Specific Window".
- Window - With the game open, select the game window.
- Window Match Priority - Choose the option "Match title, otherwise find window of same executable".
- If you are using SLI or Crossfire check the SLI/Crossfire Capture Mode box.
- Capture Cursor - Enabled
- Use anti-cheat compatibility hook - Enabled
- Enable "Capture third-party overlays" if you want to capture Steam overlays, for example.
- Hook Rate - Normal
When you are done, click OK and in OBS you will see your game window. To record, just hit "Start Recording" and "Stop Recording" when you want to stop recording.
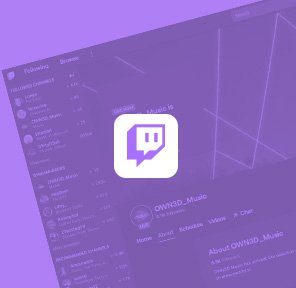
4 OWN3D Pro - The perfect Plugin for OBS Studio
If you want your recordings or streams to look professional you need an overlay. Also, if you want to make the whole content look better when sharing your camera, while showing a website or doing a tutorial, you should use a scene with a good webcam overlay.

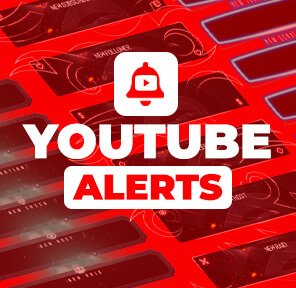
OWN3D Pro is a free plugin for OBS that will allow you to try up to 5 overlays for free and for a small monthly/annual subscription, you will be able to choose from over 900 design elements for your recordings, and streams, with overlays, webcam overlays, alerts, etc.
It's perfect for all OBS Studio users, whether you're a streamer or just looking to record your games or chats with a more professional look. Plus, it's very easy to use.
5 Best OBS Recording Settings
Your OBS default configuration is good to go, but if you want to have the best possible settings, stay with us. Here, you will learn how to make your OBS recordings look flawless and smooth. It is time to take advantage of OBS free recording software. Here are the best settings to record with OBS. Have fun!
You will start from the beginning, and one of the first things you should do is open OBS as an administrator.
1080p 60FPS - Best quality with a high-end PC
If you have a nice PC and you want to record with the best quality, here are your settings. This configuration is advised for setups with at least 16GB RAM, i5 7600/Ryzen 5 2600, with a Nvidia GTX 2060 or more.
Open "Settings" and click on "Video":
- Base (Canvas) Resolution: Select your monitor resolution, if you have a "2K" monitor select 2560x1440, if your monitor is 1080p, use 1920x1080.
- Output (Scaled) Resolution - 1920x1080. This is the resolution that your video will be recorded. Most people and videos out there have a 1080p monitor.
- Downscale Filter - Lanczos (36 samples) - This only works if your Base resolution and your Output Resolution are different.
- Common FPS Values - 60 so your recording looks smooth
Then go to Output, here is where the most important recording settings are located:
- On top look for "Output Mode" and select Advanced from the dropdown menu.
- Go to "Recording" Tab, look for “Type” and select Standard.
- Recording Path - We advise you to create a folder dedicated to OBS recordings so, later, you can find them easily.
- Recording Format - MP4 or MKV. The difference is that MKV is better if you want to edit your recordings later with a video editing software. MP4 has a downside, if your PC crashes while you are recording, your video will be lost.
- Encoder - If you have a Nvidia Graphic Card check NVIDIA NVENC H.264 (new), this way your GPU will take care of the recordings and your CPU will be less stressed.
- Rate Control - CQP (Optional: CBR at 16000 kbps)
- CQ Level - 15. You will want to use 1 for the best quality and high end PC, 15 is the middle point.
- Keyframe Interval - 2. This will let your recording be as smooth as possible.
- Preset - Max Quality (if it gives you any issues, lower this setting to Quality or Performance)
- Profile - High
- Look-ahead and Psycho Visual Tuning - Both checked on.
- GPU - 0 (if you have just one graphic card). This will be the card that will encode your video.
720p 30FPS - Best quality with a low-end PC
Not everyone can afford a 2000€ PC, but that doesn’t mean you can’t record great videos. With these settings you will be able to record videos on almost every laptop from the last 5 years, or a low-end PC. We are talking about a i3, 8GB RAM and a Nvidia GTX970 or equivalent.
Open "Settings" and click on "Video":
- Base (Canvas) Resolution: Select your monitor resolution, if you have a "2K" monitor select 2560x1440, if your monitor is 1080p, use 1920x1080.
- Output (Scaled) Resolution - 1280x720. This is the resolution that your video will have in the end.
- Downscale Filter - Lanczos (36 samples)
- Common FPS Values - 30 as it is enough for this resolution. Feel free to test 60FPS and see if your PC can handle it for getting a smoother video.
Then go to “Output”, and configure it as follows:
- Output Mode: Simple
Now you will see Streaming and Recording, disregard Streaming for now, as this tutorial is for recording only.
- Select your Recording Path by pressing Browse.
- Recording Quality: Indistinguishable Quality, Large File Size, you want your recording to be as good as possible, but you don’t want to stress your CPU too much.
- Recording Format: flv. FLV is a great format for recording and it is amazingly good for 720p recording.
- Encoder: Software (x264 low CPU usage preset, increase file size). If you think your Nvidia card is good enough, and you are not recording a game you can try NVENC so the CPU is less stressed.
In terms of sound recording, we recommend you choose as follows.
Now go to Settings > Audio:
- Sample Rate - 48khz
- Channels - Stereo
- Desktop Audio - Select your main sound card, the one that you are hearing your music, or games from.
- Mic/Auxiliary Audio - Select your microphone
6 Frequently asked questions
Where does OBS save recordings?
You can find your recordings under File > Show recordings in the top menu of OBS. You can change the folder where you want to save your recordings Settings > Output > Output mode: Advanced > Recording
How to record discord with OBS?
To record Discord audio, open Discord and record your PC's internal audio source. If you want to record in Discord, add a "Source" and capture the Discord window.
How to pause recording with OBS?
You can pause a recording by pressing the Pause icon "II" located to the right of "Stop Recording". The pause button only appears when you have already started recording.
Can OBS recording be detected?
No. You can record with OBS and you will not be detected. Only applications accessing the kernel or Windows itself can know that you have OBS recording in the background.
Why isn't OBS recording my screen?
Sometimes when you are trying to record a "Display capture" source on your laptop, you will get a black screen. The solution is easy, follow these instructions:
Windows 10 1909 or newer -
Open Settings and search for "Graphic Settings". Select "Classic App" and browse to C:\Program Files "OBS-studio" (or wherever you have installed OBS). Click "Options".
If you want to use display capture to capture your screen / desktop, select "Power Saving".
If you want to use game capture to capture a game or use the NVENC encoder, select "High Performance".
Why is OBS recording laggy?
OBS recording may be laggy because of your configuration. If you have an Nvidia graphics card, use the following settings:
Encoder - NVENC
Keyframe Interval - 2
Rate Control - CQP
CQP - 0
Preset - Bluray (if you are recording 4K)
Profile - High
B-Frames - 1
Don’t forget to check back the “Best OBS Recording Settings” section above, in this tutorial.
What is the best recording format for obs?
The best format to record is always .mkv and let OBS remux to .mp4 after recording by setting Settings > Advanced > Recording > Automatically remux to mp4. This is because if OBS doesn't finish the recording (crashes or BSOD), your video will be corrupted.
Hide OBS when recording?
Look for the OBS icon next to the Time clock in Windows. Right click on it and click Hide.
Black screen when recording obs?
If you are having trouble recording your screen because of a Black Screen showing on OBS, please read the solution here: https://obsproject.com/forum/threads/laptop-black-screen-when-capturing-read-here-first.5965/
Is OBS a good recording software?
Yes, it is a great recording software as it lets you record your screen, game or webcam in a few different formats. It is available for Windows, Mac and Linux for free. It also lets you record internal and external audio in many different audio cues, which is perfect for editing later.


