


1 Introduction
In 2021, talking about streaming means talking about OBS Studio and Twitch. For years, Amazon's streaming platform has been the #1 in the world.
And, yes, most streamers, both professionals and amateurs, use the same OBS software. Undoubtedly, OBS Studio is the most used program for streaming on Twitch because it is free, compatible with Windows, macOS and Linux, open source and a robust, reliable and very complete tool.
2 How to stream on Twitch - Basics
You are here because you want to become a Twitch streamer and we can help you do it. We will teach you everything: how to create a Twitch account, what hardware you need for your setup, how to choose the best software and talk about the importance of keeping a homogeneous design in your channel.
The first thing to do is to read Twitch's guidelines and rules of use. This is something basic and will avoid headaches in the future. It is very important to be clear about what can and cannot be done.
2.1 Hardware Check - Is your hardware streaming capable?
Streaming requires a minimum of hardware. You may have already bought some of the things we recommend, but it is always important to check that they are properly connected and configured.
Let's start with the minimum requirements your PC must have to stream on Twitch with OBS Studio:
CPU: The processor is a fundamental part of the streaming setup. You need, at least, an Intel i5 or an AMD Ryzen 5. Ideally, you should have a 6-core, but you could also stream with a quad core. The processor takes care of the encoding by default.
GPU: The graphics card is not only for gaming. It is vital that your card has at least 4GB of memory (VRAM). With OBS Studio, you can also use your graphics card for encoding. If you have an Nvidia graphics card, you can use the NVENC encoder and saturate your processor less. Ideally, you should have an Nvidia GTX 1650 Super (AMD: Radeon RX 5600) or RTX 2600 Super (AMD: RX 5700), each with 8GB of memory. The better the GPU, the better the game and streaming will be, and in competitive games or shooters, FPS is very important.
RAM: At minimum you should have 8GB of RAM, although our recommendation is 16GB. With 16GB you will never have problems, neither when streaming, nor with other programs and games.
Besides your PC, you should also think about the following hardware components:
ISP/Internet connection: Another important part of streaming is the Internet connection. Having a good connection is the difference between being able to stream and not. The higher the upload speed, the higher the quality of the streaming.
To stream at 720p at 60FPS, you will need a bitrate of 5000kbps and an upload of at least 3000kbps; if you want to upload at 1080p and 60FPS, the bitrate should be 6000kpbs and the upload should be 4500kbps. As a minimum we advise you to have a 50Mbps connection.
Also, keep in mind that the connection will also affect your gameplay. If you play multiplayer titles, it is important that the game has as little latency as possible, and this can only be achieved by having a good Internet connection.
Microphone: Although many believe that the microphone is optional, for us it is a very important part of any streaming setup. It is important to have a microphone, at least USB, to speak to and interact with your viewers. There are many types of microphones: integrated into the headset (low quality), USB (medium quality) and XLR (exceptional quality). Each has its advantages and disadvantages, for example, the XLR microphone sounds very good, but needs an external audio interface to connect it to the PC. The recommended option is to buy a USB microphone that fits your budget, especially at the beginning.
Webcam: Like the microphone, a webcam is an optional component. It is "less" necessary than a microphone, but all the big streamers use one. Our recommendation is that you show yourself to the audience as you are. Your followers will appreciate seeing you react and looking you in the face while streaming. At a minimum, we recommend buying a 720p webcam that runs at 60FPS. Ideally, if you have the budget, buy a 1080p webcam at 30 or 60FPS. There are a lot of different brands to choose from.
Lights: When using a webcam, lighting is vital. The better the lighting, the better your face will look. Also, having a couple of lights (one on the right and one on the left) helps to better set up the chroma or green screen. There are very inexpensive lights available and at the very least, we recommend buying lights that allow you to change the intensity and warmth of the light.
Chroma: If you have lights and a webcam but do not want the background of your room to show, you should purchase a green screen or green chroma. Many streamers use a chroma in their setup and are relatively inexpensive.
Stream Deck: The cat's Stream Deck is one of the most useful items for your stream. If you are a content creator with a lot of scenes and have been streaming for a while this device will literally make your life easier. You can use it to switch scenes, share messages in the chat (like your social networks), start and end the live stream, mute the microphone or stop showing the webcam. The possibilities are endless. It's not necessary if you're just starting out, but if you're serious about your streaming career we recommend getting one.
2.2 Create a Twitch account and customize it
You've read the rules, you've got your microphone and webcam ready; now it's time to start your Twitch channel. Twitch is the world's leading streaming platform and the majority of large streamers stream there.
The first thing is to create an account on Amazon's streaming platform, Twitch. As with other platforms, simply create your account using an email account and a unique password.
Open the browser on your PC and go to Twitch.tv. Look at the top right and click on the purple "Register" button. Fill out the form using your details: username, email, password and your date of birth.
Your username is the name of your channel and the one that will appear next to your chat messages. Take your time to choose a username that meets the rules and that you are comfortable with. If you make a mistake, don't worry, you can change your channel/username once every 60 days for free.
Important: Protect your account from unauthorized access by setting up two-step authentication. You will find it under "Security & Privacy" in your Dashboard. Every time you log in to Twitch, you will receive a message with a code on your smartphone or Authy App.
Now your channel has been created, but it is completely empty. Go to your profile by clicking on the image at the top right and go to "Settings". Here you can upload a Twitch banner and your profile image. Your profile image can be a picture of yourself or an avatar/logo that represents you. If you don't have an avatar, you can create one in the OWN3D Avatar Maker.
Next, we recommend writing a short description about yourself and your channel. You can tell your viewers a little more about who you are and what they can expect from your streams. You should go to Dashboard > "Profile Settings" > "Biography". Be authentic and honest.
2.3 Choose suitable streaming software
To stream on PC or from a console using a capture card, you need streaming software. There are a multitude of different streaming software options available. Each has its advantages and disadvantages. Twitch has a default program for streaming, but it is very basic.
Our experience has taught us that OBS Studio is the most complete software solution available for streaming. Proof of this is that it is #1 among content creators and streamers in the world. Launched in 2012, it has been adding new features for years and, as of today, is compatible with Windows, macOS and Linux. OBS Studio is free and open source.
It allows you to stream on Twitch, YouTube, Facebook and other platforms without much hassle. In addition, thanks to OBS you can install different overlays and create various scenes to give more dynamism and professionalism to your streams.
2.4 Ensure a consistent design
We can't stress enough how important it is that all design elements have the same style. Make sure that your banner, logo, alerts, overlay, etc. have a similar look and feel.
This will give your channel a professional look and attract potential viewers. Thanks to our designs, available in the OWN3D.pro OBS Plugin, you can set up your stream with just a few clicks. You will find more information below.
3 How to stream on Twitch with your PC and OBS Studio
In the following guide, you will find all the information you need to install and set up OBS Studio, add alerts and overlays with OWN3D Pro and start your career as a Twitch streamer using a PC.
3.1 Install and set up OBS Studio
The first thing to do is to go to https://obsproject.com in your web browser and choose the correct client for your operating system. You will see the download as soon as you open the website. Right in the middle, you will see Windows, macOS 10.13+ and Linux.
Open the installation file you downloaded and complete the process. Click "Next", "Next, select the destination folder and click Install to start the installation. When the installation is complete, you can click "Finish" and OBS Studio will start immediately.
After installation, the first time you open OBS Studio, the software is automatically configured. If you are streaming, click "Optimize for streaming" and click next. If you have a good computer, choose a resolution of 1920x1080 and 60FPS and then choose the streaming platform you want, in this case Twitch. Connect your Twitch account when prompted and you are ready to add the sources and scenes to your stream.
If you plan to use only one scene and want to start streaming now, you need to add a new source. This will allow you to share your screen, game or window. Go to the Sources window and click "+", and choose a "Game Capture", "Screen Capture" or "Window Capture".
Important: Here you can also add your video capture card as a source to record and share your console gameplay.
3.2 Adding design elements using OWN3D Pro
If you want your Twitch channel to look professional, it is best to add various elements such as an overlay, alerts and panels. This can be a hassle for many people, but don't worry, there is a very easy way to set it all up.
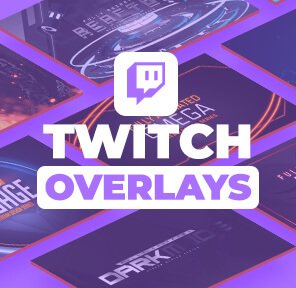
If you want to add an overlay, or change your overlay in two clicks, we recommend downloading the OWN3D.pro plugin. The first thing you have to do is login and create an account on OWN3D Pro (on the "Join Now for Free" button), connect and link your Twitch account and download the plugin here: https://own3d.pro/en/
Once you have downloaded and installed the OWN3D.pro plugin, go to OBS Studio in "Tools" and open it through a click on the plugin. Then a window will open with all available overlays and alerts. Click on any overlay you like and click install.
By default, everyone can try up to 5 free overlays, but if you want to enjoy more than 900 quality overlays and alerts, and a lot more extra functions and features, subscribe to OWN3D Pro Premium and select a plan.
3.3 Start your stream on Twitch
Once you have configured everything, checked that your camera, microphone and image are OK, and you are ready to start. Click the Start Stream button in the bottom right corner of OBS Studio and enjoy!
4 How to stream on Twitch with your Console and OBS Studio
Now, let's show you how to stream on Twitch with your console using a capture device and OBS Studio. Why? Because even having Twitch application and being able to stream directly from your console, the truth is that the live stream is bland and there is hardly any customization.
To stream live on Twitch with your console, we recommend using OBS Studio and a PC with video capture. This is the best way to add a webcam and the professional sound of your USB microphone to your console stream.
Next, we will show you what you need to do to stream on Twitch with your PS4/PS5 or Xbox console.
4.1 Connect your console and computer with a capture card
Step-by-step guide to stream on Twitch with OBS and your console
1. Turn on your PC and your PlayStation/Xbox/Nintendo Switch console (dock).
2. Connect the HDMI from your console to your video capture device.
3. Connect and set up your microphone, camera, lights, etc....
4. Open OBS Studio.
5. Create a "Video Capture Device" source to bring your console gameplay into OBS Studio.
6. Open the studio mode of OBS Studio and check that everything is in place.
7. Create and check the overlays.
8. Check all audio channels (game, music, voice etc.).
9. Start your game on the console.
10. Check that the image is OK in your streaming software.
11. Start your stream!
Disable HDCP
HDCP stands for "High-bandwidth Digital Content Protection" standard and is an encryption created in 2003 for video and audio transmission over DVI or HDMI cables.
Some capturers are not compatible with this standard and therefore will block the signal coming from the console.
To disable HDCP on your console, you must go to Settings > System > and remove the HDCP check. Easy, isn't it?
4.2 Set up OBS Studio
If you want to know how to set up OBS Studio, please refer to point 3.1 of this tutorial. There you will learn how to add scenes and sources, add a webcam and set up your microphone.
One of the most important steps when streaming from your console and using a PC is to add the video capture device as a source in OBS Studio. If you don't do this, it is impossible for your console gameplay to reach your computer.
To do this, click on "Sources" and add "+" a source. Now select "Video capture device", name it "Console" and click OK. Next, you will be able to choose the device you want to show, in this case, you will select the video capture device to which your console is connected.
One of the great advantages of streaming on Twitch using a PC + Video Capture is that you can add different design elements to your stream. We are talking about overlays, alerts, panels and tags to show the latest followers, subscribers and bits. For more information on how to add an overlay to your stream, please refer to 3.2 of this tutorial.
4.3 Start your stream on Twitch
To start your stream on Twitch, connect all components together, as we have already shown you, and click the "Start stream" button in OBS Studio (bottom right).
In a few seconds, you will be sharing your console gameplay with your friends and followers, in the highest possible quality.
5 How to stream on Twitch with your Smartphone
Do you want to stream and you are not near your PC or console? Have you gone on a trip and want to share it with your followers? Well, now you can. For a few years now, it has been possible to turn your Twitch channel into a logbook using the official Twitch app for iOS and Android phones.
5.1 Twitch app
- The first thing to do is download the Twitch app from the App Store on iOS or from Google Play on Android.
- Search for the app in the selected store and install it.
- Once installed, open it and the first thing you will see is the option to connect your Twitch account.
5.2 Setup your stream
- Once you have connected your account, on the main page of the application you will see the channels you follow and which of them are live at the moment.
- To start your stream, click on the camera icon (located at the top) or click on your profile picture and press the purple "Start Stream" button.
- When you press it, the Twitch App will ask you if you want to stream a mobile game or if you want to do an IRL live stream.
- Once chosen, you will be able to type the name of your live stream, select the category of the stream and choose the front or rear camera of the phone. If you look closely, below it gives you the option to share your live stream on social networks.
5.3 Start your stream on Twitch
To start the stream, simply add the title (although the app will set a predefined one) and choose the category. When you choose the category from the drop-down menu, the "Start Stream" button at the bottom will be activated.
6 Becoming a Pro Streamer on Twitch
Becoming a professional Twitch streamer will not happen overnight. You have to be persistent and persevering, have a content strategy, a good relationship with your followers and take care of both the quality of your streams and your social networks. One of the best pieces of advice we can give you is to be yourself.
6.1 Create a Content Strategy
Analyze your environment, what you like and what you enjoy doing and create a content strategy. Once you do that, make sure you showcase and create your personal brand. Show the public your best qualities and what you excel at.
Your content can vary, but if you are very good at playing a game, take advantage and stream that game; if, on the other hand, you are very funny or have an infectious laugh, focus your content on reacting to videos or talking to your viewers.
6.2 Interact with your viewers
To be a successful streamer you must always be yourself. This way you will build a good community. And to help ensure that your community follows you day after day, it is very important that you interact with them.
You can interact with them in several different ways: through Twitch chat, social networks, with sweepstakes, by answering their questions and even playing a game with them.
Remember that there is no successful streamer without a large community behind them.
6.3 Use different social networks to share your stream
One of the easiest ways to grow from the very beginning is by sharing your stream on social networks.
Create profiles on different social networks so that your viewers know more about you and you can communicate with them.
Having several social networks is a great way to talk, communicate or share links with your followers.
6.4 Improve your stream quality
You can improve your stream quality in several ways. The most obvious is by acquiring better hardware and peripherals, better lights, a chroma key, a good microphone or a good webcam, but you can also improve it at the software level.
The quality of your stream will improve substantially if you use an overlay, banners, and panels that share the same design. Your subscribers will also appreciate quality emotes and badges.
In addition, with OBS you will be able to broadcast at 1080p at 60FPS if your connection allows it, and increase the bitrate up to 6000, something that will greatly improve the image quality of your stream.
6.5 Remain persistent and persevering
To become a professional streamer, you don't need to have thousands of viewers. The important thing is to have a good attitude. You must set clear goals, be persistent and persevere until you achieve them.
You should also be clear about which days and times you are going to stream and try not to go too far out of your schedule. This way you will let your viewers know when you will be available.
7 Frequently asked questions to the topic how to stream on Twitch
What to stream on Twitch?
What content to create on Twitch is your decision. Time has taught us that Twitch has room for streamers of all kinds. You can stream video games, Just Chatting, music and even cooking and travel.
The important thing is to choose a topic that you are comfortable with and that you enjoy.
Who can stream on Twitch?
Anyone can stream on Twitch. All you need is a Twitch account and a PC, console or smartphone with a good Internet connection.
When to stream on Twitch?
There is no magic time to stream. Twitch has viewers 24 hours a day. No one can tell you what time is best to stream on Twitch, as everyone has a different situation.
Analyze your schedule and always stream in your free time. Remember that family and work/responsibilities come first.
How to stream on Twitch without a camera?
You can stream without using a camera. There are many streamers who, either out of shyness or for other reasons, decide to stream without a camera. However, keep in mind that viewers prefer to see the person talking to them on screen.
Can you stream directly from Twitch?
No, you cannot stream directly from Twitch. You need a computer and streaming software like OBS Studio, a cell phone with the Twitch app or a console with Twitch application integrated.
Where is the stream manager on Twitch?
Once logged in to your Twitch.tv account, you can find your stream manager by clicking on your profile picture, top right and clicking on "Creator Dashboard" or by clicking on the following link: https://dashboard.twitch.tv
What are stream markers on Twitch?
Twitch stream markers are timestamps that you can place during a stream to later locate that moment.
You can find them in your Dashboard, in the Stream Manager, in the quick actions menu. If you can't find it, press the "+" button.
During a live stream you can leave a marker by pressing the button in the Stream Manager or by using the /marker or /marker <description> command in the chat.
How often should I stream on Twitch?
When starting out as a streamer, you should always view this activity as a hobby. Therefore, your free time will dictate how many days a week you should stream. If, on the other hand, streaming is your main work activity, you should stream 4-5 times per week.


