


1 Introduction
With so many different options for streaming, content creators don't have an easy time deciding which software to start streaming with. We've already shown you how to use OBS to stream with Twitch, YouTube, and Facebook, but we're not done yet, as you can also use Discord for your live streaming.
You may know Discord as the app for voice chatting with your friends while playing your games, but Discord also allows you to share your games or screen natively.
2 Streaming on Discord - The Basics
Discord is a free instant messaging and VoIP, video, and chat software. At its launch on May 13, 2015, few expected that in a short time it would end up being the VoIP application of choice for gamers and streamers around the world. Such is its success, that during the pandemic they have reported having 140 million monthly active users and over 300 million registered accounts.
Discord is very versatile and, today, many companies use it as if it were their official forums and to communicate with their community. Over the last few months, Discord is also trying to get companies to use it and choose it over other applications such as Slack or Microsoft Teams. Anyone can create a Discord server for free and invite their friends or followers to join and participate in text and voice channels.
It is compatible with Windows, Linux, Mac, Android, and iOS.
2.1 Options to stream on Discord
There are three ways to stream through Discord depending on whether we are on a PC or Mac, or if we want to do it from our smartphone and tablet.
On PC we can share our games or screens using the free official Discord app. This will allow you to stream your game window or capture what is being viewed on your entire monitor (without audio).
2.2 Requirements to stream on Discord
The first thing you need to stream on Discord is to download the Discord application. You will also need a PC or smartphone/tablet and have a Discord account created. With this you will be able to stream on Discord natively.
If you want to stream in Discord from your console, you will need a console, a capture card and, surely, OBS.
In the following point we will show you how to create a Discord account, how to download Discord for your PC and even everything you need to stream Discord using your phone.
3 How to stream on Discord with your PC / Mac without an streaming software
As we have already mentioned, Discord will allow you to stream your monitors and games without external programs. This option is fine if you just want to show the game to your friends, do not stop reading until point 4 or 5 of this guide.
3.1 Install Discord on your PC or Mac / Create an Account
Go to the official Discord website. Here you have to create your account by going to the top right, where it says Log in, and click on Register.
Then, go back to the Discord home page and right at the top, click on Download and download the client for your operating system. For this tutorial, we will use the Windows client.
Once downloaded, open the .exe and install the program. Choose the installation path and click Next until it finishes.
It is already installed, now open Discord and the first thing it will ask you for the data of the account you just created (if you didn't have an account before). Enter them and you will be inside. If it is the first time you create a Discord account, you will have neither friends nor servers on the left. If, on the other hand, you already used Discord before, on the left you will see a list with all the channels you have created or joined before.
Let's assume that the account is new and you don't have any server, so now it's your turn to create a new server. To do this, you must look for the "+" sign on the left side of the program, click on it, and choose the type of server you want to set up. In the latest versions, Discord allows you to use default templates according to the use you are going to give to the server, and allows you to choose between: Games, Study Groups, Clubbing, Local Community...
After choosing the type of server, it will ask you if it is a server for friends or to set up a large community. Choose the option that fits your needs and it will be time to put a photo and a name to the server.
Depending on the option chosen, the server will automatically appear with several default channels. If you have chosen to create a server for a Gaming community, you will see 2 text channels and two voice channels. Don't worry about them as you will be able to edit them and even add more voice and text channels, using the "+" next to each of the categories.
Important: Both the name and the logo are very important as they will determine your identity. Think carefully about the name and remember that it cannot be offensive. If you do not know what logo to choose, in OWN3D we have a gaming logo creator with which you can get your perfect logo.
3.2 Configure and start your stream on Discord
Streaming with Discord is very simple. There are not many options to configure, since the program configures itself and unlike others it simply allows us to stream our screen or window of the chosen game.
To start your stream in Discord, you simply have to enter a channel on your server and click on the "Screen" button, at the bottom left, just above your profile picture. When you click on the button, a window will open asking if you want to stream a specific window or if you want to share the whole screen.
Note: When streaming the entire screen, the stream will not have audio.
Once you have chosen the window or screen you want to share, you will get a window that will allow you to choose the quality and FPS. By default we will be able to stream at 720p at 30FPS, if we want 1080p and 60FPS we will have to purchase the Nitro version of our Discord account for $99.99 per year or $9.99 per month. More information about Discord Nitro here.
4 How to stream on Discord with your PC and OBS Studio
If you want your Discord stream to be as professional as the one you could do on Twitch, Facebook or YouTube, it's not enough to simply share the screen in the Discord application. You need a video source to which you can add your webcam, overlays and all those graphic elements that separate a good stream from a normal one.
Unlike streaming with Discord without OBS, to stream in Discord using OBS as a source, we need the OBS Studio plugin: OBS Virtualcam.
4.1 Install and set up OBS Studio
Open https://obsproject.com in your browser and choose the client according to your operating system. This time we will use Windows, but you will see the download as soon as you open the web, Windows, macOS 10.13+ and Linux.
Go to the download folder and start the OBS installation until the process is complete. Click "Next", "Next, select the installation folder and click Install to start the installation. When the installation is complete, you can click "Finish" and OBS Studio will start immediately.
The first time you open OBS Studio the program will automatically configure itself. If you are streaming, click "Optimize for streaming" and click next. If you have a good computer, choose a resolution of 1920x1080 and 60FPS. This time, since we are going to broadcast on Discord, you don't have to choose the Twitch or YouTube platform. Just finish the configuration and you are ready to add the sources and scenes to your stream and install the OBS Virtualcam plugin.
If you plan to use only one scene and want to start streaming now, you have to add a new source. This will allow you to share your screen, game or window. Go to the Sources window and click "+", and choose a "Game Capture", "Screen Capture" or "Window Capture".
Important: Here you can also add your video capture card as a source to record and share your console gameplay.
4.1.1 Install OBS Virtualcam Plugin
In order to send the OBS Studio signal to Discord you need the OBS VirtualCam plugin. Thanks to it, you will create a virtual webcam whose signal will be your OBS scene and you will be able to select it in Discord as your main webcam.
Close OBS Studio, if you had it open, and go to the plugin page, OBS Virtualcam and download the plugin. You can download it using the white "Go to download" button at the top right.
Once downloaded, install the plugin and choose the folder where you have installed OBS Studio. If you did not change the installation path when you installed OBS Studio, you don't have to change anything now either.
Now, re-open OBS Studio and follow these steps:
- Select Tools -> VirtualCam in the main OBS Studio window.
- Press the Start button, then close the dialog.
- Open your Discord and go to Settings > Voice and Video > and select OBS-Camera as your webcam.
From this moment on, everything that is happening on your OBS screen will be automatically sent to the OBS VirtualCam and you will be able to use it in Discord or any other application that allows you to use a webcam (Skype, Zoom...).
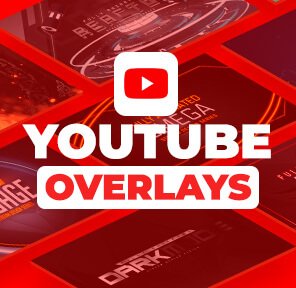
4.2 Adding design elements using OWN3D Pro
Want to make your Discord stream look professional and add an overlay or graphic elements to your signal? The solution is very simple. This can be a hassle for many people, but don't worry, there is a very easy way to set it all up.
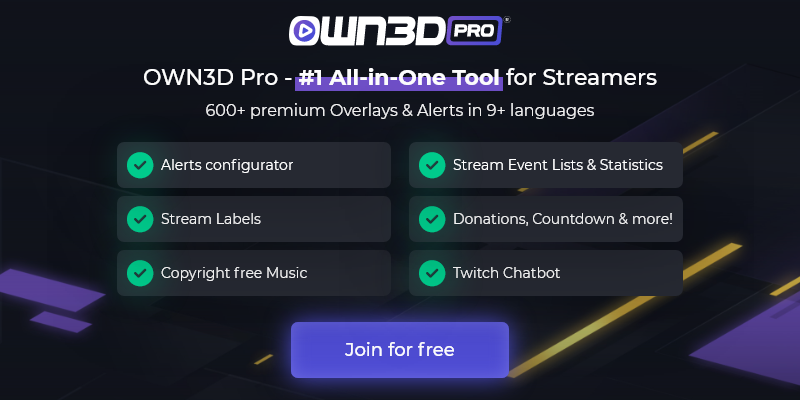
If you want to add an overlay, or change your overlay in two clicks, we recommend downloading the OWN3D.Pro plugin. The first thing you have to do is log in and create an account on OWN3D Pro (on the "Join Now for Free" button), connect and link your Twitch account and download the plugin here: https://www.own3d.pro/en/
Once you have downloaded and installed the OWN3D.Pro plugin, go to "Tools" and open click on the plugin. Then a window will open with all available overlays and alerts. Click on any overlay you like and click install.
All users have up to 5 free overlays available to try, but if you want to enjoy more than 900 quality overlays and alerts, and a lot more extra functions and features, you have to subscribe to OWN3D Pro Premium.
4.3 Start your stream on Discord
To start the live, instead of choosing "Screen", you have to choose the "Video Call" option. It is the camera that appears just to the left of "Screen". Click on the camera and the stream will start in a moment.
5 How to stream on Discord with your Console and OBS Studio
If you want to stream your console games on Discord, you will need a PC, a video capture device and the OBS VirtualCam plugin.
5.1 Connect your console and computer with a capture card
Step-by-step guide to stream on Discord with OBS and your console
- Turn on your PC and your PlayStation/Xbox/Nintendo Switch console (dock).
- Connect the HDMI from your PlayStation to your video capture device.
- Connect and set up your microphone, camera, lights, etc....
- Open OBS Studio.
- Create a "Video Capture Device" source to bring the gameplay from your console to OBS Studio.
- Open OBS Studio's studio mode and check that everything is in place.
- Create and check the overlays.
- Check all audio channels (game, music, voice etc.).
- Start your game on the PlayStation.
- Check that the image is OK in your streaming software.
- Close OBS Studio and install OBS VirtualCam (see point 4.1.1).
- Open Discord, enter a channel and go to the options.
- Choose OBS VirtualCam as your main webcam in Discord > Settings > Audio & Video. Start your stream!
5.1.1 Turn off HDCP
HDCP is short for "High-bandwidth Digital Content Protection" standard and is an encryption created in 2003 for the transmission of video and audio, through DVI or HDMI cables.
Some capturers are not compatible with this standard and therefore will block the signal coming from the console.
If you want to remove the HDCP on your PlayStation, you must go to Settings > System > and remove the HDCP verification. Very easy.
5.2 Set up OBS Studio
If you want to learn how to set up OBS Studio, go back to point 4.1 of this tutorial. There you will see how to add different scenes and sources, as well as a webcam or microphone.
The most important thing to be able to stream from the console, using OBS, is to add, as a source, the video grabber to OBS Studio. If you do not add it, it is impossible for your computer to be able to receive the signal that your console is sending, and therefore, it will be impossible for OBS VirtualCam to send it to Discord.
To do this, you have to click on "Sources" and add "+" a source. Select "Video capture device", name it as "Console" and click OK. Next, we can choose the device we want to display, in this case, we will select the video capture device to which our console is connected.
If you want to add several design elements to your stream from the console, you can read how to do it in point 4.2 of this tutorial.
5.3 Start your stream on Discord
To start the live, instead of choosing "Screen", you have to choose the video call option. It is the camera that appears just to the left of "Screen". Click on the camera and the stream will start in a moment.
6 How to stream on Discord with your Smartphone / Tablet
As of today, April 2021, the Discord application for Android and iOS only allows us to share the screen and does not let us share games automatically. However, we know that the screen sharing mode on smartphones and tablets is in a testing phase in the Discord app for Android and iOS.
6.1 Discord app
To install the iOS version of the Discord application on your iPhone, please visit the App Store de Apple. from Apple. If you have an Android phone or tablet, you will have to do the same but from Google Play.
After installing the application, the first thing you will need to do is to log in using your Discord account. If you don't have a Discord account, you can create one from the application itself. Fill in your details as we showed you in point 3 of this guide and you are ready for the next step.
Log in the app and Discord will connect to your account. If you had already created a server or you were joined to several Discord servers, they will appear in the application. If you are coming from scratch, you will need to create a server and the voice and text channels on it.
6.1.1 Create a Discord server from your phone and make a call
Open the Discord mobile app on your iPhone.
In the menu on the left, tap the + icon.
Tap Create a server and enter the name you want to give your server. Finish creating it by tapping "Create server".
Next, the app will ask you to invite friends to join your server. You can skip this part by clicking the X.
The application will take you directly to your new server, where you should start creating channels and configuring them.
Tap the menu icon in the upper right corner of the screen. These are the three horizontal lines.
In the main part of the screen, you will see the existing channels on your server. By default, there is a text channel (#general) and a voice channel (General).
Click on the General voice channel (or the voice channel where you want to stream).
A pop-up window will appear asking you to confirm this action, so click "Join Voice". Discord will ask for permission to access both the microphone and your phone's camera and speaker, say yes to everything.
You will now be joined to a voice channel and, if there are more people in that channel, you will start to hear them and you will be able to talk to them. To talk to one of your friends privately, you have to click on their name and select the camera icon (video call) or the phone headset icon for a voice call.
6.2 Start your stream on Discord
Now that we have explained how to talk to your friends, it is time to show you how to share your screen or your mobile camera with them.
It is as easy as, being inside a channel, clicking on your user name inside the channel and choosing the icon corresponding to what you want to do. If, for example, you want to share with the Discord channel the camera of your mobile, you have to click on the first icon that appears below, the camera icon.
If you want to share the screen of your phone or tablet, you will have to choose the second icon that shows a mobile with a protruding arrow. When you click on the icon, you will get a confirmation message and when you click on it, the stream will start and your friends who are on the channel will be able to see the screen of your mobile. To end the stream, go back to the application and press the "Stop streaming" button.
Important: Unlike the stream with the YouTube or Twitch application, in the Discord stream we will not be able to configure a name or a description for our event.
7 Additional info to stream on discord
You have already created your Discord server, but it is very basic, a voice channel and a text channel. To have a Discord community as professional as possible we recommend you to create several voice channels, separated, for example, by games or activities, and also add some Text channels. In all Discord channels, there is a basic channel, the AFK channel, for people to move there when they are going to be away from the computer for a few minutes.
This way, you can have a specific chat channel for your stream and even a dedicated voice channel for streaming. You can set it up so that only you can talk and the other participants can only listen. The options are endless.
Finally, you can also add bots to your Discord server that will help you manage your community and even automate actions such as sharing news about games, sharing your tweets, and even notifying all users when you are streaming. You can read more about this topic in the official Discord guide.
8 Frequently asked questions to the topic how to stream on Discord
Why can't I stream on Discord Mac?
You can stream/share your screen on Mac, but no games or audio natively. Audio is only supported on Windows 10.
Why is my stream on Discord black?
This may be because of your Discord configuration, but it also could be because the video you are trying to stream is protected.
Go to Settings > Voice & Audio > Screen share and turn off “Use our latest technology to capture your screen”. If that option is turned off, try turning it on.
Why when I stream on Discord there is no sound?
If you are using a Mac, sadly you won’t get any sound. Discord's official app won’t let you share the sound apart from your microphone.
If you are having this problem on Windows, go to Settings > Voice & Audio > Screen share and turn off “Use an experimental method to capture audio from applications”. If that option is turned off, try turning it on.
Why can't I stream on Discord mobile?
Check that your Discord app is up to date and if you gave the app the required permissions.
What games can you stream on Discord?
You can stream all your games in Discord, using the “Window sharing” option or the screen option (with no sound). Checkpoint 3 on this guide for more information.
What is stream mode on Discord?
The streamer mode is the solution Discord implemented to Discord for not being disturbed while you stream. The software will recognize that you are streaming with OBS, for example, and mute all your alerts and notifications. This way, if someone writes you a private message on Discord, it won’t show up live during your stream. Also, this Stream Mode will hide your invite links, mute all sounds and hide personal information.
What movies can I stream on Discord?
If you live in a country where streaming movies is illegal, then it is illegal to do it. But Discord lets you stream movies to your chat channel or even on a private call. It is your call if you want to take the risk or not. Some platforms like Netflix have a security system that makes your stream go black to prevent you from streaming movies and TV shows on Discord.
How to stream on Discord without lag?
If you are having trouble with lag on Discord this may be a problem of Discord servers it selves. Also, check if your Internet connection is working fine, or restart your router, terminate the unnecessary programs, update your drivers, and clear Discord cache files.
How to stream on Discord without sound?
On Discord, go to Screen (lower left corner) > Screens > and select your screen. Then go Live. This way you will be able to share your screen with no sound.


