


1 Setting up your YouTube or Google account

So let's start with the basics. This chapter is all about creating your first YouTube account and setting it up accordingly. Here, we'll explain everything you need to know to effectively and quickly get ready for a career as a creator on YouTube. We'll walk you through the entire process of setting up your first account and give you some valuable tips along the way.
1.1 Account creation
YouTube is owned by Google, which means that in order to set up a YouTube account, you first need a Google account. This way, you can fully use YouTube not only as a consumer, but also as a creator. In case you've set up an online account somewhere before, you know roughly what to expect. If not, no big deal either! Because creating your Google account is easy as pie and can be done in a matter of minutes.
Before you start, it's worth mentioning that you can use an existing email address for this step, as well as create your own new Gmail address directly in the course of creating your account. Gmail is Google's in-house email service. So if you don't have your own email address yet, creating a Gmail account is the ideal option.
So below we will show you step by step how to create a Google account, which you can then also use as a YouTube account.
- Visit the website www.youtube.com
- Click on the "REGISTER" button in the upper right corner.
- Since you can't log in yet due to the fact that you don't have an account yet, click on "Create account" in the following window.
- In the pop-up menu, select whether this is an account for yourself or for a company.
- Now enter your first name, last name and email address. If you don't have an email address, click "Create a new Gmail address instead".
The option to create a new Gmail address may be the best one in some circumstances. Even if you already have a private Gmail address! In fact, we highly recommend you to clearly separate your private YouTube account from your streaming account. This way, private things won't get mixed up with your activity as a streamer and everything concerning your streaming account will end up in the inbox of the newly created email address.
Also, it's always a good idea to have a second email address - you can use your private address as a backup email address in case you ever forget your new account's credentials.
If you surf with the Google Chrome browser and have your two Google accounts stored there, you can switch between the accounts with just two mouse clicks. On the YouTube homepage, you can switch between your YouTube accounts with all browsers by simply clicking on your profile picture in the upper right corner -> Switch accounts.
- Choose or generate (browser or browser plugin dependent) a secure password, enter it in the next field and confirm your entry in the following field.
- Then click on "Next".
- In the next step you can enter your phone number and an email address for account recovery. These fields are indicated as optional, but they are for your account security, so you should consider entering at least one of these two pieces of data. At the latest, when you want to start your livestream, you will need a confirmed account, which will only be unlocked if you leave a phone number.
- Now enter your date of birth and your gender and click on "Next" again.
- Now it's time for the personalization settings. Select your preferred setting here and click "Next".
- What follows are the terms and conditions set by Google, which you must accept in order to successfully create your account.
- Once you have read, accepted and confirmed everything, it is done - your Google account has been created.
- Last but not least, you need to create a YouTube account with your new Google Account.
Now that you're the proud owner of a YouTube account, you can use YouTube to its fullest potential. Both as a consumer and as a creator.
1.2 YouTube Studio

Before setting up your channel, we would like to briefly introduce you to the so-called YouTube Studio. YouTube Studio is your creative hub. The place on YouTube where the
strings are pulled and where almost everything concerning your channel is managed.
It also gives you a detailed overview of what's been happening on your channel. Whether it's analytics, user comments, or the channel dashboard. With YouTube Studio you can monitor and optimize your channel.
1.3 Channel branding - set up profile picture, banner, watermark, description, etc.
So the time has come, you're about to take off as a streamer on YouTube. But before you really get started, there are a few things you should take care of. One important topic that needs your attention is the so-called channel branding. This is your entire presence on YouTube. In other words, everything that users see, even if they are not currently following your content live. The basic structure of every successful YouTube channel!
With your channel branding, you make your channel, as the name already says, a brand and ensure an optimal first impression with the users. The channel branding includes profile picture, channel banner and the watermark for your videos. The important thing here is that you choose a consistent design that runs like a thread through your online presence - this is the only way to make yourself and your channel an unforgettable brand that burns itself into viewers' minds.
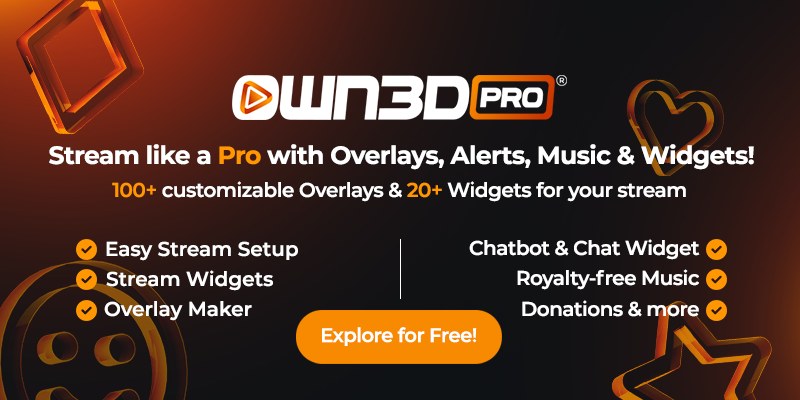
A perfect way to enhance your channel with great designs to leave a lasting impression on viewers are the unique and high-quality packages from OWN3D. In our store you will find everything your streamer heart desires for your YouTube channel!
1.3.1 Profile picture

So let's take care of your profile picture first. Your profile picture is, so to speak, the figurehead of your channel and is displayed during all your activities on YouTube. So when you comment on other videos, upload a new video and it shows up in your subscribers feed or in the info box under the video or stream.
Before setting up the profile picture, make sure that the image file is in JPG, GIF, BMP or PNG format and has a size of about 800 x 800 pixels. In addition, the image should be as square or round as possible.
- First, open the YouTube Studio. You can do this by clicking on your current profile picture in the upper right corner and then selecting "YouTube Studio" from the pop-up menu.
- In the menu on the left, you'll see the little magic wand icon. Clicking on it will take you to the "Customize" menu.
- Now select the "Branding" tab in the top menu.
- The first menu item is directly the one you are looking for: Image.
- Click on the "UPLOAD" button to open the explorer of your operating system.
- Now navigate to the picture you want to upload, select it and upload it.
- Since YouTube profile pictures are circular in shape, you will need to crop your profile picture again afterwards. Make sure that no important elements like letters or other information are cut off.
- When your crop is perfect, click DONE.
1.3.2 Banner

When people visit your channel, they will see the channel banner at the top of the overview page. This image is much larger in size and will therefore be more prominent. At best, the profile banner is a perfect complement to your profile picture.
This means that it speaks the same design language and yet reveals some more information about your channel. So, to build branding, you should definitely make sure that your channel banner matches the rest of your presence on YouTube, but at the same time is present, catches the eye and doesn't disappear into insignificance.
The channel banner is the advertising poster of your channel and already gives the visitor some concrete clues about what to expect on your YouTube channel.
Channel banners should be at least 2048 x 1152 pixels and have an aspect ratio of 16:9. Again, the image format should be JPEG, PNG, GIF or BMP.
- Go to the YouTube Studio page again.
- In the "Customize" menu, click on the "Branding" tab.
- Just below your profile picture settings, you will see the settings for your channel banner.
- Click on "UPLOAD" to open the file explorer and select the appropriate image.
- Now you have to crop your channel image. Make sure that tablet, smartphone, laptop and desktop users can see your channel image in all its glory. The cropping lines will help you with this.
1.3.3 Watermarks

Watermarks in practice always ensure that the content shown belongs to a particular person, company or organization. YouTube watermarks work in a similar way - with one particular twist: users can interact with them.
Specifically, this means that you can click on them to become a subscriber to the channel. This is especially useful when watching a video in full screen and YouTube's user interface disappears.
This way, viewers always have the option to subscribe to your channel without having to exit full-screen mode. In addition, the YouTube watermark is part of your channel branding and provides a certain recognition value. A small but nice addition to your channel!
The source file of a watermark should be at least 150 x 150 pixels and square. In addition, the file size must not exceed 1 MB.
- Go to YouTube Studio again.
- In the "Customize" menu, click on the "Branding" item.
- Scroll down to the category named "Watermark in video".
- Now upload your new watermark.
- You then have the option to customize how your watermark is displayed in your videos or streams. Here you can set the duration and timing of the display.
As you can see, customizing your channel branding is easy as pie. Your channel should present an appealing and thoughtful overall image to viewers. Therefore we would like to point you again to the OWN3D Shop! Here you can find individual banners, profile images or watermarks for your YouTube channel. Our designs are perfectly coordinated so that your concept runs through your channel like a red thread.
2 YouTube settings (channel, upload settings, permissions & community)

Now that you're almost ready to go, we'd like to familiarize you with the basic YouTube settings. The main purpose here is to give you an overview of the settings YouTube offers as a platform and how you can optimize or customize them.
YouTube is the largest video platform in the world and therefore it is not surprising that there are various menus, customization options and settings. The starting point for these settings is once again the YouTube Studio. How to get there, what it can do and why it is the most important menu for Creator, we have already explained above.
2.1 Settings -> Channel
In this menu you can set and manage Name, Keywords & Country.
Name is self-explanatory - here you can change the name of your channel. However, you should think about this step carefully before making the change. Especially for creators who have already built up a branding, a name change of the channel can have fatal consequences.

The best thing to do is to think of a suitable name when you create your account and keep it. That way, there won't be any confusion within your community later on, and your brand can keep growing. Your interests, if you don't like the name anymore or if you need a new coat of paint, should be put in the back of your mind in this case.
Keywords lets you store keywords for your channel. Keywords are usually used to indirectly describe your channel by filling it with keywords that match your content. For example, if you are a gamer and play various video games, you can enter all the gaming keywords and the titles of the games as keywords. These keywords then work similar to hashtags in social networks. So if someone searches for the keywords you entered, you have a better chance of being found!
For this reason, you should definitely look for suitable keywords and collect them. There are even some keyword tools on the Internet that you can use to generate a list of keywords that is perfectly tailored to your channel.
Country of residence is the menu item where you can choose in which country you live. You should stick to the truth here, because depending on where you live, the requirements and guidelines for participating in the YouTube Partner Program differ, which we will introduce to you in detail later in this article.
2.2 Default upload settings
Here you set certain default settings for your uploaded videos. Depending on what you set here, these settings will be applied to all your future uploads. So be sure to pay attention to what you do here, because these settings may not apply to all of your videos, which could result in them having a negative impact on the performance of your videos.
The General Information tab is all about title, description, visibility, and tags. If you want to tag all your videos with a description template, you can do that here. It's recommended that you tag this box with your social media accounts so you don't have to reinsert it in every video. This will save time and provide some consistency across your channel. You can add tags if your videos all cover the same or similar topic, - so if you have a thematic approach. This way your videos will be found better!
You can also make advanced settings. This is about the category in which your videos should be listed, the language of your videos and titles and which comments should be displayed. You even have the option to completely disable the comment function under your videos. You can also determine whether users can see the ratings, i.e. "thumbs up" & "thumbs down".
As you can see, it's important to make settings on your channel before you become a creator yourself. Determine exactly how you want your channel to work by familiarizing yourself with the default settings for your uploads.
3 Before your first livestream

You're ready to go! Your channel is set up, all settings and optimizations have been made, and your first livestream is ready to go. Because YouTube offers some interesting possibilities, we would like to elaborate on a few points concerning livestreaming itself. With our useful tips, your first livestream will be perfect!
3.1 Everything about the YouTube stream key
For streaming via streaming tools (e.g. OBS) there is the YouTube stream key. You need this randomly generated combination of numbers and letters to start your transmission with a streaming program. It contains all information about your channel including URL, password and everything else. Once you insert it into your streaming tool, the program automatically connects to your account and you can control everything from that program from now on.
Your stream key is therefore very valuable and should never fall into the wrong hands.
You can find your personalized stream key when you start your stream on YouTube's website.
- To do that, click the "Create" icon in the upper right corner of the YouTube website.
- Select "Start Livestream" from the pop-up menu.
- Choose whether you want to start your stream now or schedule it to start on a future date.
- Now we come to the important point: in this step you will be asked for the type you want to stream on. Choose "Streaming software" and click OK.
- In the following menu you will see the stream settings including the stream key.
3.2 The three ways to stream on YouTube (Mobile, Streaming Tool & Webcam)
3.2.1 Mobile

You have the chance as a creator on YouTube to stream live from your mobile device (smartphone, tablet). This works for both devices with iOS and Android operating systems. With mobile livestreams, you are even closer to your viewers and can host so-called IRL streams.
Creators take their subscribers on tour and film, for example, their everyday life, how they are on vacation or when something significant happens in their life. IRL streams are becoming more and more popular on all portals, because fans are happy to see their favorite entertainers off the beaten track. Once you crack the magic mark of 1000 subscribers, the mobile streaming feature will be unlocked for your YouTube channel. In addition, you should not have allowed yourself any significant blunders in streaming or in your videos in the last 3 months.
When we talk about mobile streaming, we usually mean that the source of your stream is your smartphone's camera. However, there are also methods to stream content like games or apps directly from your smartphone. However, this feature is only available for iPhone/iPad users so far with the help of the official app "iOS ReplayKit".
- Download the official YouTube app from your smartphone's app store.
- Open the app and log in with your YouTube or Google account.
- On the app's home screen, you'll see the prominently placed Plus icon at the bottom. Click on it and select "Start Livestream".
3.2.2 Streaming Tool (OBS)

This method of streaming on YouTube is by far the most used. It is the most classic way to broadcast your stream on YouTube. Most gamers and creators resort to this approach when it comes to going live. A streaming tool, such as OBS Studio, serves as a link between the streaming service and the computer. It filters the sources, modifies them if necessary, adds other sources and sends the image and sound directly to YouTube accordingly.
Streaming tools serve as a command center for your large-scale streams, because with the help of these programs you control the entire stream, add overlays or transitions and determine exactly what the viewer gets to see. This way, video games, reactions and most of what you see on streaming portals are picked up and transmitted. Unlike streaming with your smartphone, you don't have to meet any specific requirements for traditional streaming.
To use this method, you need nothing more than a working computer, a YouTube channel and the appropriate program. OBS Studio is the tool that has proven to be the ultimate streaming program over the last few years. It's free, very powerful in its functionality and relatively easy to use.
- Download OBS Studio from the official website and launch it.
- In order to use the program to stream on YouTube, you need to connect it to your YouTube account. This is done via the so-called YouTube stream key. We have already explained how to create and find it above.
- Open the settings in the main menu of OBS Studio and click on "Stream".
- Select "YouTube / YouTube Gaming" as the service and "YouTube Server" as the server.
- In the lowest field named "Stream Key" there is now space for your stream key.
- Add your stream key there, click on "Accept" and then on "OK" and close the settings.
Now you're ready to stream with OBS Studio and delight your viewers with unique content. Your YouTube account is now connected to OBS Studio and all you need to do is add different scenes and configure your stream the way you like.
3.2.3 Webcam

While you can of course add a webcam to your stream using streaming software, YouTube also offers the option to create a livestream using a webcam directly from the website.
This means that your viewers will only see your webcam and not the content you reveal from your computer.
All you need for webcam streaming is, logically, a webcam and a YouTube account enabled for livestreaming and verified accordingly. Even though the setup is very easy, we would like to help you with a short step-by-step guide.
- Open the YouTube homepage.
- Click on the plus symbol, i.e. the "Create" button on the upper right side and select "Start Livestream".
- You can now decide whether you want to start your stream immediately or schedule it for a later time.
- In the next step you will see the option "Integrated webcam" right at the top. Click on OK
- The next menu allows you to adjust many settings - you will learn more about them below.
3.3 YouTube Stream Schedule

YouTube has a built-in schedule feature that allows you to plan your streams. This feature is especially interesting for creators who have already built a community of regular viewers.
You announce your YouTube livestreams and all people subscribed to your channel get a notification about it. This way you create anticipation early on and can give your viewers time to prepare for the stream - to get snacks, free up some more time or simply prioritize.
The schedule feature is available to every creator, scheduling streams is easy. Before you start a livestream, you'll always be asked if you want to start the stream immediately or schedule it for a later time.
This way, you can determine exactly when you're going to go live - which is ultimately what your viewers will see in their notifications. A practical and extremely useful feature that should not be underestimated.
4 Your first livestream

So in this section, let's take care of starting your first livestream and optimizing it. Now that you know all the ways to start a livestream, let's get down to the nitty gritty. We'll go over all the expert settings and modification options below.
Before you start your stream with OBS Studio, once you've decided to stream with an encoder, you can go to the overview page of your stream. Here you can see both the video window, the chat, the stream settings and everything that belongs to your stream.
4.1 Settings (URL, stream key, latency)
The stream settings show you again the menu for the stream key you should have already inserted in OBS, your stream URL for sharing and the URL of your backup stream.
When selecting the stream latency, you should consider what has higher priority for you: the image quality or a latency-free transmission. In streaming, latency is the delay it takes for the streamed content to reach your viewers.
So, if the latency is high, the communication between the chat and you may always overlap or be delayed. You can choose between normal and low latency on YouTube Live.
Normal latency gives viewers the best picture quality but also causes delays, whereas choosing low latency gives you lightning-fast, almost lag-free streams with slightly lower picture quality.
Therefore, you should think carefully about which setting is right for your purposes. For streaming video games or similar content, the normal latency is suitable because viewers usually prefer a high picture quality to a latency-free stream.
However, if you should chat extremely much with your chat and value communication in (almost) real time, we recommend you to choose a low latency. This is at the expense of image quality, but it also improves the dynamics of the stream.
4.2 Title, Category, Description Game Title, Thumbnail, etc.
4.2.1 Title

A crucial setting, which may also have a direct impact on viewer numbers, is the title of your stream. Besides the thumbnail, this is the information that a user has before he clicks on your stream.
Thus, you should optimize the title of your stream, which in practice means that it should provide all the information about what content is available on your stream. A title that says "My first livestream" will not arouse interest.
" Especially potential new viewers often decide within seconds if they want to watch a stream or not, so a good title helps to attract more new viewers to the stream. Furthermore, it is important... "
On the contrary, - it even discourages, because users want to watch professional streamers as much as possible. Moreover, it is important that the title is not too long, despite all the information. You do have a maximum of 100 characters of space, but we recommend that you don't use it to the fullest, because the user may not be shown the entire title in the preview, but only part of it.
How much is ultimately displayed always depends on which device, YouTube view, and display scaling or resolution you are browsing YouTube on. Instead of holding on to various numbers, keep your title as concise, inviting, and informative as possible.
Much more crucial is the outline of the title, which means that the information that is most crucial belongs right up front. For example, that would be the title of the game, which is directly supported by a creative headline that follows it. Example: "Witcher 3: We're hunting the Trophies!". This title not only shows what content the user will get to see, but also goes into detail to differentiate from other streamers.
4.2.2 Description

The Description field is essential and should not be neglected. Here you can record who you are, what you do and store your social media accounts. But what makes this field so interesting is the use of so-called keywords.
Conveniently, these keywords also work in the background and serve to make it easier for people to find your stream. Use this feature as effectively as possible to reach a wide audience. The keywords in your stream description should describe your content in the best possible way and still cover the basic keywords as well. To make your stream stand out even more, you can also include the first words of your stream title in the description again.
These will then act as keywords and help make the stream even more visible. Also, it can be beneficial to add some interactive elements to your description such as playlist links that lead directly to your channel. Lastly, you should also point out that people can subscribe to your channel for free. So the description is not only to maximize your viewership, but also to get new regular viewers.
4.2.3 Thumbnails

You probably already know thumbnails from the videos you can find on YouTube. But you can also use them for your livestream. Good and high-quality thumbnails arouse the interest of users and can entice them to click on the stream!
They should be individual and perfectly adapted to the content and accordingly make people want to see more. If you are familiar with the basics of image editing, you can already create beautiful and inviting thumbnails. If this is not the case, you can resort to one of the many thumbnail creator tools in that can be found on the Internet.
Some of them are free and very easy to use. If in doubt, you can also take a simple picture and label it with Microsoft Paint.
4.2.4 Playlists

YouTube playlists are especially interesting for projects that cannot be completed within one stream - for example, Let's Plays of video games. Very few games can be played through in one livestream, which means that you have to split the Let's Play into several streams. With a playlist, you ensure that there is order on your channel and viewers get a better overview of the content of your channel.
The age restriction issue can be especially important if you are showing content that is not suitable for people under 18. This option mainly concerns gamers, because some video games are only released for 18 years old, which logically leads to the fact that the livestream on which this game is shown is also from 18. If in doubt, find out what the age rating of the game you want to stream is before starting your game.
5 The Live Chat

The live chat of your YouTube stream is the essential link between you and your viewers. It's where the streaming happens, and it's also where some of the most memorable livestream moments occur.
It's the linchpin of your stream and serves as a perfect and more or less unfiltered source of feedback. That's why you should pay at least as much attention to your live chat as you do to the content you're presenting.
How the different functions of your chat work, what you have to pay attention to and how you make certain basic settings, we will explain to you in this extensive chapter.
5.1 Basics and the 3-point menu

Every live stream on YouTube automatically has a live chat. This is activated as soon as you start the stream. When you archive your streams, even the chat is saved and users can watch the chat in real time when they watch the VOD on your channel or in the corresponding playlist.
Both you as the creator and your viewers can also view the live chat in a new window instead of on the right side of the browser window. This feature is especially interesting for people who have multiple monitors, because it allows you to play the stream in full screen and still follow the chat. You can display the chat in a new window by clicking on the 3-dot menu on the upper right side and then selecting the menu item "Show chat in new window".
Besides the actual chat messages, however, the chat also displays some additional information that might be important for you and your viewers. For example, your messages are highlighted with a special symbol (crown) so that they do not get lost in the bustle of the chat. In addition, if you participate in the YouTube Partner Program, you have the option of adding a special logo to members' messages.
Especially with livestreams with many viewers, it can quickly become quite confusing. For this reason, YouTube has introduced the "Top Chat" function, which each viewer can activate individually. When activated, all spam messages are filtered out so that only the important messages are displayed at the end.
Another feature when clicking on the 3-dot menu is the display of all chat participants. Here you get a list of which users are currently participating in the chat. This function can be helpful in that you have the possibility to search for certain users and then mention them by name. By the way, this works by adding @[username] to the chat message.
5.2 Super Chat & Super Sticker

The Super Chat is an interesting way to earn money with your work as a creator on YouTube Live. Your viewers can send a message to the chat via the Super Chat and attach a freely selectable amount of money to this message.
This will not only cause the message to be highlighted with a particularly eye-catching color and accordingly stand out from the crowd of "normal" messages, but also cause the message to be pinned in the chat. This means that for a certain time, depending on the amount of the donation, it will be permanently visible to all viewers at the top of the chat.
So if your viewers have something on their mind, something they really want to get off their chest, but the chat is so busy that it's hard for you to give all the messages the attention they deserve, they can make sure the message gets seen in any case by making a small monetary contribution.
It's often the case that one Super Chat donation is immediately followed by the next, because your viewers may feel reminded that they like your content so much that they want to support you. So it's not uncommon for Super Chat donation to be followed by Super Chat donation, so that you as a streamer can hardly keep up yourself.
So Super Chat is not only a very profitable source of revenue, it also helps you and your community bond and serves as indirect advertising - because when a Super Chat message pops up, viewers feel reminded that they should support you too.
Parallel to the Super Chat, there is also the Super Sticker function. These work similarly to Super Chat, except that instead of sending a written message, viewers send a sticker and link it to a donation.
Both Super Chat and Super Stickers are available for your channel once you have at least 1000 subscribers and participate in the YouTube Partner Program.
You can learn more about what the YouTube Partner Program is all about in Chapter 7 "How to make money with YouTube" below.
6 YouTube channel analytics

As an active creator on YouTube, you naturally want to know how your content is received by your audience, how your streams differ from each other in terms of performance, and whether your numbers are growing or shrinking.
Only with a good analysis of this data can you find out where there is room for improvement and which screws you need to turn in order to maximize your reach. This possibility is offered to you by the channel analysis function, which can be found in YouTube Studio.
How the whole thing works, how you can read out the data and what you have to keep in mind, we will explain in this chapter.
6.1 Basics
You can view the corresponding analyses and measurement values of your livestream either during or after the stream has ended. During the stream, the data is available in the Livestream Dashboard. This is the menu that is displayed when you start your stream.
Here you can see a preview of what your viewers will see, the live chat, the stream settings and also the analytics.
For a more detailed overview of your data, you can use the YouTube Studio. To get insight, simply navigate to the Analytics menu when you are in YouTube Studio by clicking on the corresponding button on the left side of the overview page.

Note that the metrics are available for a maximum of 72 hours after the end of your stream. Once this time has expired, the data is automatically deleted. For this reason, you should analyze your past streams as soon as possible.
In addition to the option to view the data of your live streams, you can of course also take a close look at your uploaded videos, including past streams in VOD format.
6.2 Read out analysis data correctly
In the real-time overview of your data during the live stream, various values are displayed. In the "Analyses" tab of your stream dashboard, you can view the following data. The data is updated regularly during the stream.
- Simultaneous viewers: This value describes the number of viewers at the last updated time.
- Chat Frequency: This shows how active your live chat is and how many users are actively using the chat at any given time.
- Replays: This is the number of views, or total clicks on your livestream.
- Average playback time: The average amount of time viewers are watching your stream.
By keeping an active eye on these analytics, you can do quite a bit to breathe new life into the stream during quieter and more inactive periods by taking targeted actions during the stream.
For example, if the chat frequency shows a negative trend, you can directly address the chat and ask for feedback or suggestions for improvement. You can also use various in-game actions to elicit a reaction or two from the chat, such as smileys or comments on the situation.
This way, the stream always remains more or less active. You can also directly influence the average playback time by keeping your content interesting and avoiding boredom during your stream.
In concrete terms, this means nothing other than: Always stay on the ball, comment on what's going on in the stream, make sure there are moments worth watching, and include chat.
You will receive detailed analysis data after your stream in the YouTube Studio. Here you can once again see exactly how the past livestream has developed and whether new viewers have regularly joined or people have tended to drop out, using data and diagrams. In the analytics section in YouTube Studio, you can view and analyze the following metrics in detail.
- Replays: This is the number of views, or total clicks on your livestream.
- New subscribers: How many new subscribers did you gain during the livestream? This menu item shows you.
- Playback time: The total playback time of all users is added up and displayed here.
- Duration: The exact duration of your past stream.
- Average playback time: The average time viewers have watched your stream.
Along with the data you can view during your livestream, the analytics tool in YouTube Studio gives you a great way to review your stream in metrics as well.
After just a few broadcasts, you'll get a feeling for how your analyses should ultimately be evaluated. Only by comparing the last streams with each other can you get an idea of what you need to improve and in which areas you are already doing well.
Channel analyses are extremely important for you as an ambitious YouTube streamer, because many streamers have potential for optimization in many areas, especially in the early days.
7 How you can earn money with YouTube…

Turn your hobby into a profession - be a creator and earn money with streaming. Probably the dream of many streamers out there, but even if the earning opportunities on YouTube Live are very good, you as a newcomer first have to overcome one or two hurdles. And even though these hurdles may seem unattainable for you at first, let me tell you this: Basically, anyone who approaches the matter with the necessary motivation and a portion of ambition has the chance to earn good money as a streamer on YouTube.
What the requirements are, what the YouTube Partner Program is all about and what the nature of this income can ultimately look like in concrete terms, we will explain in this chapter.
7.1 Basics & Requirements
The world's largest video platform is home to tens of thousands of creators who generate income with their content. What this content ultimately is, which topics are covered, and which target group is addressed is of secondary importance at first.
Anyone can create the content they want on YouTube, as long as they don't violate the guidelines. So theoretically, anyone can earn money. Precisely because there is a target group for almost every topic.
But no matter whether you want to earn money on YouTube with video or streaming content: The basic prerequisite for this is that you participate in the so-called YouTube Partner Program.
7.2 YouTube Partner Program

The YouTube Partner Program is a comprehensive program that allows creators to earn money with their content on YouTube. In order to apply for this program, your channel has to meet some requirements. You can find out what these are in the following list.
- You are at least 18 years old.
- Your channel has over 1000 subscribers.
- You have a playback time of at least 4000 hours with your videos in the last 12 months.
- You strictly follow YouTube's monetization guidelines.
- YouTube affiliate program is available in the country where you live.
- You have connected your channel account to Google AdSense.
Once you meet all these requirements, you can officially apply for the YouTube Partner Program. As I said, you can apply - just because you think you meet YouTube's requirements doesn't mean you'll automatically be approved for the YPP.
Each application for the YPP is personally reviewed in detail by Google staff. In addition to the basic requirements that your channel must fulfill, one thing in particular is important to those responsible at YouTube: that the channel complies with YouTube guidelines.
After your application, your channel will be closely examined and analyzed, and an individual decision will be made as to whether or not a channel may participate in the partner program. By applying, you automatically accept YouTube's terms of use, with which you explicitly state that you will comply with all guidelines.
If this is not the case, your application will be rejected. So you should be aware that you are publishing your content on a platform that provides you with the necessary storage, reach, advertising, service and monetization opportunities. So, you are virtually a guest on YouTube, - therefore, you have to abide by the rules that the host tells you to follow.
7.3 Monetization opportunities
Once you join YouTube's affiliate program, you have many different ways to earn money with your channel. However, each of these options in turn has its own individual requirements, which will need to be re-enabled if successfully fulfilled.
You can earn money with advertising revenues directly after joining the YouTube Partner Program. The requirements are the same as those for joining the YPP, which then automatically goes hand in hand. You are entitled to place custom ads for your viewers, from which you then earn money. The most classic and easiest way to monetize your channel.
You can also offer channel memberships to your viewers right at the start. The success of this method depends massively on how users receive your content and whether they feel the need to support you as a creator directly from their own wallets.
Channel memberships are a great thing - both for you as a streamer, and for your viewers and fans. The latter have the opportunity to support you monthly with a fixed amount of money, but in return they also receive benefits such as exclusive content in the members area or custom emojis. You can read more about memberships in our last chapter.
Super Chat and Super Stickers are available for you and your viewers when you join the YouTube Partner Program. With this feature, your viewers can pin and highlight their chat messages for a small donation amount. The higher the amount, the more exciting the highlight and longer the message is pinned to the top of the chat. Everything you need to know about Super Chat and Super Stickers can be found above in the Live Chat chapter.
You can even offer your viewers your own YouTube-integrated merchandise store. Here you can post and sell your own products. From T-shirts to coffee mugs to bed linen - there are no limits to your creativity. This function will be activated as soon as your channel has collected more than 10,000 subscribers.
8 Subscribers, Members, Perks, Emojis & Badges

So how do the different ways of supporting your channel differ from each other? What's the difference between subscriber and member? What are membership levels? We'll answer questions about these and other topics in the final chapter of our ultimate YouTube Live guide.
8.1 Subscribers
A subscriber on YouTube is completely free for both creator and viewer. All the viewer needs to subscribe to your channel is a YouTube account. By clicking the "Subscribe" button, a user silently declares that he likes the content on this channel.
Because from then on, he or she is not only a supporter of the channel, but also receives notifications about new uploads and upcoming livestreams. Even if subscribers don't bring money directly, they are the perfect confirmation of your work as a creator and streamer.
At the same time, an increasing number of subscribers naturally goes hand in hand with more stable viewership. Everyone who subscribes to your channel will almost certainly visit it again and sooner or later stumble across one of your videos or livestreams.
Of course, enthusiastic subscribers are also indirectly free advertising, because once you find a channel you like, you naturally want to share that with your friends. This eventually leads to word getting out about your channel and a single subscriber generating three more.
8.2 Members
The status of "member" is fundamentally different from that of subscriber. While a subscription is free of charge without exception, a membership is chargeable without exception. You will find a detailed chapter in this article on the requirements for offering channel membership to users. As a channel operator you have the possibility to offer a membership to your viewers. How expensive this is, you decide alone!
Viewers have the choice to sign up for a one-time membership or a monthly recurring membership. You can also offer up to five different levels of membership, which are tiered in price and unlock more benefits for members as the level increases. Note that you must offer at least one new benefit for each higher level. You can make these settings in your YouTube Studio in the "Monetization" section.
A common way to stagger these different membership levels is to have the user's selection of usable emojis and logos expand as the level increases. You can also add exclusive content to your channel for members, which can then only be viewed by members of the level you set. This way, you increase the incentive for your viewers to become members of your channel.
8.3 Emojis & Badges
Your loyal channel members can enjoy exclusive and customized emojis & badges. Upload particularly exciting and beautiful emojis to reward your members for their support and to give other viewers an incentive to become members as well.
In addition, members of your channel also receive custom logos that appear in front of their username in chat. This way, it's always clear who is supporting you monetarily! You can even offer logos that change in appearance depending on how long you support them. Someone who just signed up for a new membership won't have the same logo in front of their name as someone who's been at it for 2 years.
A good way to illustrate the different logo levels is to use colors. While a white logo looks pretty basic, a 2-year member can show off a gold logo in chat. You can find many different logos & emojis in our store, of course.
9 FAQ - YouTube Streaming
For the most common problems that can occur with a YouTube Livestream, we have summarized the appropriate solutions for you.
Do I have to pay for a YouTube Livestream?
No. On YouTube you can stream and upload videos absolutely free of charge.
Why is my YouTube Livestream so quiet?
This may be due to the settings in your broadcaster software. The best thing to do is to increase the audio control for your microphone.
Why does my YouTube livestream hang?
This can have several causes: Either your upload line is too low or disturbed, your CPU is overloaded or the settings in your broadcaster software are not ideal. On YouTube you will find many good tutorials that will help you in all these cases.
YouTube livestream without camera?
It is possible. But considering the large number of streamers, you should consider using a camera. YouTube Livestreams in which you can see the streamers basically have more viewer influx.
Where can I find current YouTube livestreams?
On the YouTube homepage, go to "Live" in the left vertical menu. There you will be presented with various livestreams as suggestions.
Under the tab "Gaming" you will find current YouTube livestreams on video games.
How do I earn money with YouTube livestreams?
There are several ways to earn money with YouTube livestreams. The easiest way is to place advertisements. You can find more information here. Other possibilities are presented in our article "Earn money with Twitch".


