


The most important facts in brief
- With the new Xbox consoles you can stream to both Twitch and YouTube. Streaming to YouTube is currently not directly supported by the console. Sooner or later an update will solve this problem.
- If you want to perfect your stream, you should think about buying a capture card. With this card you can raise your stream optically and technically to a new level and have the possibility to stand out from other streamers.
- The OBS Studio program has proven to be the best tool for streaming with a capture card for years.
- 4K streaming is the future. Although it is currently only supported by YouTube, Twitch will certainly follow suit.
- Not every capture card supports 4K streaming. Most cards are still designed for Full-HD.
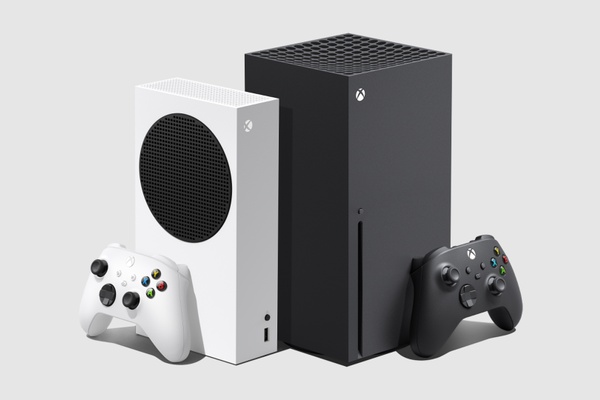
Possibilities for streaming with the Xbox Series X / Series S
It is now very easy to turn on the Xbox and start a stream. Both the Xbox Series X and the Series S support streaming via the Twitch app, which can be downloaded from the Microsoft Store. This requires hardly any settings or specific hardware. The alternative to this rather simple approach is streaming via capture card. This opens up many possibilities to control and beautify your stream. This method has many advantages, but also more effort and higher costs.
With Capture Card
First you should be aware of the resolution you want to stream in the future. Since the Xbox Series X is a console that focuses on 4K gaming, if you own this console, it might be interesting to be prepared for the future. With a 4K capture card you can theoretically start your stream in highest resolution. Although 4K streaming with Capture Card is currently only supported by YouTube, Twitch will almost certainly offer the possibility to stream in 4K in the near future as part of the next-gen console releases. So you should definitely pay attention to which resolutions your new capture card supports. If you own the Series S, which is "only" designed for playing at 1440p, a Full-HD capture card should be sufficient.
When buying a new capture card, make sure that the card has a so-called "4K Passthrough" function. This allows you to play the game in 4K resolution yourself while you transfer in Full-HD.
So for the best streaming experience, we recommend a 4K capture card - you should be well prepared for the next few years, because 8K gaming will soon become irrelevant.
Streaming with a capture card offers you some advantages over the option of streaming directly from the console. While you will need an additional PC or laptop to get the best results, the advantages of a capture card are obvious. So you can control your stream on your PC and adjust it to your preferences down to the smallest detail. Especially the possibility to work with overlays should not be underestimated here. They can put the finishing touches on your stream and usually look more professional than a completely blank stream screen, as you know it when you transfer directly from the console.
Without Capture Card
The streaming directly above the console is much more beginner-friendly. For newcomers, who would like to slowly approach the topic, this is the ideal opportunity to stream live on Twitch without any pressure and at no cost. Leaving aside the technical limitations, streaming without a capture card offers many advantages and is accessible to virtually everyone. All you need is a Twitch account.
How to stream from Xbox Series X / Xbox Series S - Video
Stream to Twitch with the Xbox Series X / Xbox Series S - step by step guide
In this chapter we explain how to start a stream on Twitch directly from the console as well as with Capture Card.
Xbox Series X / Series S streaming without a capture card
1. setting up the Twitch account
As already mentioned, it is necessary to have a Twitch account to stream on Twitch. To create it, first open the URL www.twitch.tv on your laptop, PC or smartphone. Alternatively you can use the Edge Browser already installed on your Xbox. Now you see the button "Register" in the upper right corner. This is the keyword - click on it and follow the instructions. The registration is easy and fast. You can now use your new Twitch account both as a normal viewer and as a creator. That means you can follow other channels besides the actual streaming and comment in chats.
2. personalize Twitch channel
Before you sit down at the console again, we recommend you take a closer look at your new Twitch channel. You can now equip it with information about you and your stream. Create an inviting, nice profile and upload a nice profile picture to make a promising first impression on potential viewers.
3. download the Twitch app
Unlike the PlayStation 5, the new Xbox consoles do not have the streaming option via Twitch directly integrated into the system, but you need the official Twitch app from the Microsoft App Store to start the stream. To download it, just start the app store on your Xbox home screen and search for "Twitch". Confirm the download and shortly after that the app is installed on your console. Start it now and log in with your account.
4. stream settings
Before you start, you can make a few settings in the Twitch app on your Xbox. To do so, navigate to "Settings" in the app and click through the options. There you can set the video quality or how many frames per second you want to transfer. The combination of 1080p and 60 FPS offers the best streaming experience for the viewer, but requires a very good internet connection for you as host. For that setting, a line of at least 10,000 kbit/s is recommended. Here, you should definitely consider what your line provides. A great video quality and a smooth picture is not worth anything if the stream hangs constantly because your Internet line is reaching its limits. You set the video quality by adjusting the bitrate. The higher the bitrate, the better the image of your stream. In addition to the bitrate, you should choose the actual stream resolution - if you have slower internet, choose the 720p method, if your line is strong enough, you can choose Full-HD, i.e. 1080p.
5. start of the stream
Let's go - you start your stream! But before you do that in full anticipation, you should think of a good stream title. When choosing a title, it makes sense to orientate yourself on the game you want to broadcast. One round of Assassins Creed: Valhalla? How about "The Vikings are coming! We wield the axe in Assassins Creed: Valhalla". Not your thing? Never mind, the main thing is that your title is meaningful and interesting. Now you are only one click away from going under the streamers. Check again if your settings are correct and if your title does not contain any spelling mistakes or similar. Then you are ready to go. Click on "Start Streaming" and entertain people with your gameplay.
Xbox Series X / Series S Streaming with Capture Card
You want to get started right away and run your stream over a capture card? You have chosen the best possible method. The big world of streamers is open to you and it's up to you to provide your viewers with the ultimate streaming experience.
1. make the connection between PC, console, TV and capture card
This point varies depending on which capture card you choose. It is best to follow the manufacturer's instructions. Usually the Capture Card is placed in the PC on the mainboard and from there connected to the console and the monitor via HDMI cable. External Capture Cards usually require an additional power source or a connection to the USB port of the PC or laptop.
2. OBS Studio Download
You have now successfully set up your capture card and are now wondering how to start your stream? Maybe you've heard of OBS Studio. It's a free program that allows streamers to set up and manage their stream in the best possible way. OBS Studio is the most widely used tool and almost every major streamer relies on it. It offers countless possibilities and the handling is relatively beginner friendly. To download the program, visit the OBS website and download the installation file for your operating system. After successful download open the file and follow the instructions.
3. use OBS Studio and connect Twitch account
Before using the program for the first time, take a look at the official Quickstart Guide, which you can find on the manufacturer's website. It explains the basics and gives you an idea of what is possible with OBS Studio. Alternatively, you can take a look at our comprehensive OBS tutorial, where we show you step-by-step which settings you need to make in OBS to start a professional stream.
First, you should connect your Twitch channel to OBS. OBS Studio then acts as a kind of interface between the Capture Card and Twitch. To perform this step, go to the "Stream" item in the Settings menu and select Twitch in the "Provider" section. Now a browser window will open automatically, where you have to log in to Twitch with your login data. Once this is done, you can connect your account and are almost ready to go.
4. video quality of your stream
If you still have the settings open, click on the menu item "Output" and get a short overview of the possibilities. These can be a bit daunting at first, but actually there are some standard settings you can use.
If not already set by the system, you should choose x264 for the encoder. This offers the highest stability and has been the most common option for years.
It might be more interesting for you below, because here you can set the video quality of your stream. The quality control method CBR ensures that your stream always runs smoothly and does not hang. Bitrate and buffer size should always be the same. What you enter here depends entirely on your upload speed. If you have fast internet from 10.000 kbit/s, you can try 3500 in both fields. If your line is not very fast, we recommend a value of around 2200. A high bitrate means better video quality for your viewers and reduces artifacts in the image.
5. video
Of course a high stream resolution is extremely important for many viewers. Streams that run in 720p are hardly watched nowadays. The demands are getting higher and higher and whoever tunes in to a stream usually wants to watch the game in the best possible quality. So you can set the desired resolution in this menu item. Again, you should make sure that your internet connection is strong enough for the respective resolution. If you plan to stream in 720p, don't worry - the signal that arrives on your monitor or TV will remain in the resolution of your output device (TV or monitor). As for frames per second, we always recommend 60 FPS to give your viewers the ideal experience. However, if your internet is not fast enough, 30 FPS is always a good choice.
Xbox Series X / Xbox Series S streaming on YouTube without a capture card
Unfortunately it is not yet possible to stream directly from an Xbox console to YouTube. In Microsoft's App-Store the YouTube app is offered, but it is only designed for consuming videos. So you can watch videos and streams on your Xbox Series X / Series S without any problems, but even streaming from the console is not possible for the time being.
Xbox Series X / Xbox Series S streaming on YouTube with Capture Card
As an owner of an Xbox you will need a capture card to stream to YouTube. The setup is pretty much the same as the one you use for Twitch streaming, except for a few minor details. In the chapter "Xbox Series X / Xbox Series S Streaming on Twitch with Capture Card" we already went into detail about how to start a Twitch stream with OBS.
1. introduction
So the hardware settings like installation and connecting the respective components are behind you and you are ready to log in to your YouTube account via OBS.
2. adjust YouTube account
Your YouTube channel is the figurehead for your stream. To personalize the channel, open the YouTube homepage with your internet browser on your PC or laptop and click on your channel picture in the upper right corner. Under "My channel" you can, for example, set a profile picture and write a short description about you and your channel. This way you will be found faster and viewers will be more effective in finding you and your stream.
3. OBS Download
Again, open the Downoad page and install OBS Studio on your laptop or PC after successful download. On the website you will also find a useful Quickstart Guide, which will help newcomers to the program and familiarize them with the most basic settings.
4. YouTube login via OBS Studio
In the menu of OBS you can now log in with your YouTube data under the item "Stream" and connect your account. After you have made the settings for video quality and resolution, your stream is ready to start.
Insert overlay into your Xbox Series X / Xbox Series S stream
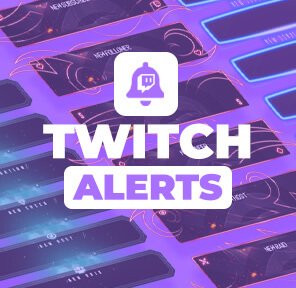
With OBS Studio you can give your stream that extra something by enhancing it with visually appealing overlays and panels. Overlays are graphic elements that permanently adorn your stream, displaying useful facts such as chat, audience count and alerts, and looking great at the same time. Meanwhile there are a lot of overlay designs that fit to almost every game. Here you can let off steam creatively and help your stream get clicks with an exciting design. For a huge selection of designs we recommend you to visit our store. There you will surely find one or the other design that fits you and your stream.
With our overlays you have the complete carefree package, because the designs are already in the right image format and can be easily installed and customized with a few clicks.
Insert overlays into your stream
Let us show you how easy it is to add overlays with OBS Studio.
First, you should create a new scene in OBS. You do this by clicking on the + at the bottom left of the screen and selecting "New Scene". A scene is an additional element for your stream, and can be a torn image from your console or an image that overlays the scene below. Since you want to insert a new image as source in this case, click on the + under "Sources" again and select "Image". Now you can open the usual file explorer of your operating system and insert the desired file. So navigate to the place where the image file of your design is stored and double click on it or select it and confirm with "OK".
Done - your overlay has been inserted and your stream stands out from a mass of streams. You can also insert different overlay scenes to switch between different stream states. Many streamers have a main screen and a pause screen that is shown to the viewers when the stream is paused. Try to use your new favorite overlay in the best possible way - this way you get the most out of your stream.
Capture Card and PC
For a personalized, good stream, the use of a capture card is virtually essential. Almost all major streamers are advocates of this method and viewers thank them for it, because it is the only way to create individual, unique streams. Together with the free OBS Studio tool, the potential of a capture card is only fully developed and nothing stands in the way of an unforgettable stream.
The difference between an internal and an external capture card
Internal
Internal means, as the name suggests, that the Capture Card is installed in your PC. In most cases and especially with current cards the PCIe slot on your mainboard is used for this purpose. The internal Capture Card is powered directly from the computer's power supply and is connected to the monitor and console mostly via HDMI cable.
External
If you place products of both variants next to each other, the external capture card looks like a completely different device at first, but in essence both methods offer exactly the same functions. The only difference to an internal card is that the external Capture Card requires one or two more cables to pick up the game console. Most manufacturers rely on the good old USB connection for this. Often when using cheap external capture cards, a so-called input lag occurs, which can lead to frustrating moments, especially with fast games like shooters. We therefore recommend the purchase of a capture card with "low latency" or "zero latency" function.
Lightstream Studio
You want to visually enhance your stream with overlays but don't have a PC, don't want to buy a capture card or don't want to deal with the technicalities of the initial setup with OBS Studio? Then we have just the right thing for you.
Console streaming is booming, but not everyone has the financial and technical resources to create a high-quality stream. Lightstream Studio could help here. The cloud-based service switches while you stream directly from the Xbox via Twitch in between and offers countless setting options such as inserting overlays.
We've written a short guide for you on how to start a stream in no time and take advantage of the benefits of Lightstream Studio.
- Visit Golightstream with a browser on your computer and create an account. You will have several choices. Make sure which one is right for you.
- Now you can log in to your Twitch account via Lightstream in your browser and connect the two providers. Twitch remains the platform you are streaming on, Lightstream only acts as an interface between the console and Twitch.
- Start a new stream project on the Lighstream website and customize it to your needs. You can add overlays and make various stream-related settings.
- Everything is ready, you can open the Twitch app on your Xbox and start the stream But before you do so, make sure that Lightstream is selected as the "destination". Once this is done, you can start your stream as usual and it will shine in new splendor - without a capture card, cable tangle or computer.
- While the stream is running, you now have the ability to access it and adjust "On the Fly". Have fun!
Xbox Series X / Xbox Series S Streaming FAQ
Do I need a camera and microphone to stream with the Xbox Series X / Series S?
Camera and microphone are of course not absolutely necessary, but can be crucial to bind viewers to your stream in the long run.
Can I connect and use any camera and microphone to my Xbox?
As long as they are connected via USB, this should not be a problem.
Why can't I stream to YouTube with my Xbox without a capture card?
Only Microsoft knows that. However, we strongly expect this feature to be added in the near future with a software update.
Should I buy an external or an internal capture card?
That depends on what you like better. Many people prefer the internal version to an external card because of the elimination of the extra cables. However, if you want to stream from a laptop, you will need an external capture card.
Do the Xbox Series X and Xbox Series S differ in streaming?
There is no difference in the basic functions. Both consoles run on exactly the same operating system and the operation and installation of various components such as capture cards or input devices is identical. The only difference is that the Xbox Series X, precisely because it is the 4K console, can stream gameplay in 4K. The Series S is based on the hybrid resolution 1440p.


