


Downloading and unpacking your stream overlay package
First, you have to download your OWN3D.tv package. Move your mouse over your profile icon next to the shopping cart on the OWN3D.tv website, and a menu will open. Click on the "My downloads" button. There you will find your purchased package. You can select the language of your choice by clicking on the flag symbol before downloading it. Be sure to remember where you save it on your PC, as you will need it right away!
Now you have to unpack your complete OWN3D.tv package. There are several free software that you can download online. We recommend 7-Zip or WinRAR. Install one of this software so that you can extract the contents of the package.
Right-click on your downloaded file to open the Windows menu. Click on "Extract All...". - a window opens where you can select a destination folder for the extracted ZIP folder. If you leave the default selection, the program will save the extracted files directly into the same folder where your ZIP file is located. If you want to select a new folder, click on "Browse" and choose your desired destination path.
Once you have defined a destination folder, click on Extract. It should be done in just a moment.
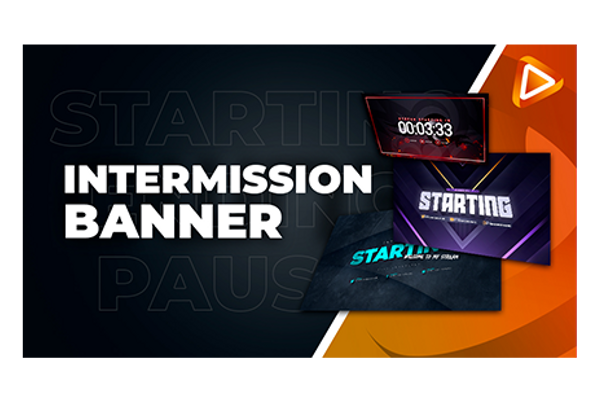
Inserting Animated Intermission Banners
Your complete OWN3D.tv package contains a folder called "Animated-Intermission-Banner." This is where you will find the video files you need to set up a start, pause or end scene - these are also known as WEBM files.
This chapter will show you how to insert the start scene’s WEBM file ("rodan-intermission-starting") as a source in OBS. You can simply follow the same steps for the pause and end screens with their respective WEBM files.
Look for the "Scenes" dock in OBS Studio and select the scene where you would like to insert the start video file. We have named this "Start Scene." Clicking "+" in the "Sources" dock will bring up a drop-down menu that allows you to include various elements in your stream scene. Now select "Media Source" in the menu to add your video file.
The "Create/Select Source" window appears. Here you can either create a new source or insert an existing one into your scene. This means that you can directly add a source you’re already using in a different scene to this one (via the “Add existing” list) without having to set it up all over again from scratch. Name your new source (e.g., "Overlay start scene") and then click on "OK."
Source properties
This will take you to the properties window of your new media source. This is where you will add the WEBM file to the OBS scene. Click on the "Browse" button on the right side of "Local File." A Windows Explorer window will pop up. Navigate to the unzipped folder of your complete package and select the desired .webm file from the "Animated-Intermission-Banner" folder. Since we’re currently setting up a start scene, we choose "Rodan-intermission-starting."
Now set the checkmark to "Endless loop" so that the file remains continuously animated, and click on "OK."
Now you have integrated your animated intermission banner! You can always double-click on the media source to return to the properties window if you ever want to make changes to your source settings (speed, color range, looping or swapping out the WEBM file entirely).
Edit media source in the live preview
To make changes to your media source in the live preview, you can either directly click on it on the video screen or by selecting it from the “Sources” dock. A red frame will appear around it in the live preview.
To change the size of the media source, grab it by the corners. You can move it across the screen by drag-clicking on the source. You can also crop it by pressing "Alt" at the same time on the edges. The frame of the cropped area turns from red to green. If you cut away too much, you can grab the frame again with "Alt" at the same place and change the cut.
These editing options work with almost all sources in OBS. If something goes wrong, you can undo the last action with "Ctrl + Z" or restore it with "Ctrl + Y."
Scene without social media channels
The animated intermission banner in your complete OWN3D.tv package features callout spaces to social media channels where you can promote your other platforms. The next lesson will teach you how to add text elements to your scene to fill these out.
If you don't want to show social media channels here, the intermission banner is also available as a "blank" WEBM file in the package (in this case, "rodan-intermission-starting-blank"). You can add this to your scene by simply going through the steps mentioned earlier at the beginning of this lesson.
Add text to a scene in OBS
Look for the "Scenes" dock in OBS Studio and select the scene where you want to insert the text source. Clicking "+" in the "Sources" dock will bring up a drop-down menu that allows you to include various elements in your stream scene. Now select "Text (GDI+)" in the menu to add your text source.
The "Create/Select Source" window appears. Here you can either create a new source or insert an existing one into your scene. This means that you can directly add a source you’re already using in a different scene to this one (via the “Add existing” list) without having to set it up all over again from scratch. Name your new source (e.g., "Instagram name") and then click on "OK."
Text source properties
This will take you to the properties window of your new text source. Write your text in the "Text" field: in our example, it is "OWN3D.academy". You can also adjust the various properties (font, color, opacity, background, alignment and more) of your text source in this menu. Once you’re done, click on "OK". Your text source is now added to your scene.
You can always double-click on the text source to return to the properties window if you ever want to make changes to your source settings described above.
Edit media source in the live preview
To make changes to your media source in the live preview, you can either directly click on it on the video screen or by selecting it from the “Sources” dock. A red frame will appear around it in the live preview.
To change the size of the media source, grab it by the corners. You can move it across the screen by drag-clicking on the source. You can also crop it by pressing "Alt" at the same time on the edges. The frame of the cropped area turns from red to green. If you cut away too much, you can grab the frame again with "Alt" at the same place and change the cut.
These editing options work with almost all sources in OBS. If something goes wrong, you can undo the last action with "Ctrl + Z" or restore it with "Ctrl + Y."
Add countdown with OWN3D Pro
This chapter is for those who have already registered for OWN3D Pro and installed the OWN3D Pro tool for OBS Studio. If you still need help with this, take a look at the OWN3D Pro: Setup and First Steps chapter!
Setting up the OWN3D Pro countdown timer is quick and easy. Once you have installed OWN3D Pro for OBS and you have logged into OBS Studio with your OWN3D Pro credentials, you can select the source "OWN3D Labels" in "Sources" in OBS by clicking on the "+". Go to "Create New", give the source the desired name (we call it "Countdown Start") and click on "OK".
OWN3D Pro Countdown source properties
Now the properties window will automatically open. Here is where you can set up your new OWN3D Pro label. Select "Countdown" in the “Type” dropdown list. Choose the desired color, size and font. With that, your label is ready!
If you’d like to change your label’s size, do so within the properties menu. It is also possible to manually resize the source in Preview mode, but then the source will be pixelated.
Moving the countdown in the live preview
You can move the countdown now. Click on the label in the "Sources" dock and you will see that a red frame forms around the label. Now you can grab and drag it around the preview screen.
Update the countdown in the OWN3D Pro Dashboard
The countdown will automatically update as soon as you have defined and saved the countdown time in the OWN3D Pro Dashboard under Tools → Countdown. The countdown will also start in your stream.
If the countdown does not update automatically, even if you have defined and saved a new time, there is a small workaround: click on the "Countdown" source in OBS, briefly set one of the labels at "Type", but immediately change it back to Countdown. Now you should have the correct countdown, and you can click on "OK" to properly set things up.
Inserting your countdown element into other scenes
If you want to integrate your already existing OWN3D Pro label into another scene, you can also select the source "OWN3D Labels" in the other scene at "Sources" by clicking on the "+".
Since the label already exists in your scene collection, having already created it yourself, you only have to select "Add existing". Click on the label’s name and on "OK": now you have the exact same label as in your other scene.
Keep in mind that changing the countdown element’s font or color in your new scene will also change it everywhere else since it is the identical source. If you want to create an individual, new countdown, follow the instructions at the beginning of this lesson and make a completely new source.
Ordering your sources
Imagine your sources like the layers of an onion or a stack of cards. The one at the top of the "Sources" dock is the source that is above all others. The source that is at the bottom, in the last position, is behind all other sources. If you don’t order them correctly, you might find that your webcam is hidden behind the gameplay footage, invisible to viewers.
So how do you determine the ideal order? In most cases, you should always display alerts or labels above the overlay, while the overlay should be above the gameplay and webcam. Something like this:
- Alerts (OWN3D Pro or similar tool)
- Labels (OW3ND Pro or similar tool)
- Live chat (OWN3D Pro or similar tool)
- Text sources
- Media source (overlays or webcam frames)
- Video capture source (webcam)
- Video capture source (capture card if streaming via PS4 or similar)
- Game capture/window capture
This order should ensure that there are no overlaps and your stream is perfectly legible. Of course, this order can be adjusted depending on your setup: not everyone has a webcam or chat integrated into the scene. It is just an approximate guideline.


