


Downloading and unpacking your stream overlay package
If this is your first time downloading and unpacking your complete OWN3D.tv package, this chapter is for you. If you have already done this, feel free to skip to the next one!
First, you have to download your OWN3D.tv package. Move your mouse over your profile icon next to the shopping cart on the OWN3D.tv website, and a menu will open. Click on the "My downloads" button. There you will find your purchased package. You can select the language of your choice by clicking on the flag symbol before downloading it. Be sure to remember where you save it on your PC, as you will need it right away!
Now you have to unpack your complete OWN3D.tv package. There are several free software that you can download online. We recommend 7-Zip or WinRAR. Install one of this software so that you can extract the contents of the package.
Right-click on your downloaded file to open the Windows menu. Click on "Extract All...". - a window opens where you can select a destination folder for the extracted ZIP folder. If you leave the default selection, the program will save the extracted files directly into the same folder where your ZIP file is located. If you want to select a new folder, click on "Browse" and choose your desired destination path.
Once you have defined a destination folder, click on Extract. It should be done in just a moment.
Why you need a dedicated streaming tool for your alerts
Many large channels on Twitch use so-called alerts to display actions from viewers, such as donations or follows. Usually, a funny animation or a special sound is played to emphasize the action. This makes users feel valued and appreciated as they get specifically featured on the broadcast.
Alerts work with streaming tools like OWN3D Pro or StreamElements. These tools are connected to the streaming platform and transmit current events live in the stream. You only have to set up the respective alerts beforehand and integrate them into OBS Studio, and new followers and the like will be automatically acknowledged with an alert.
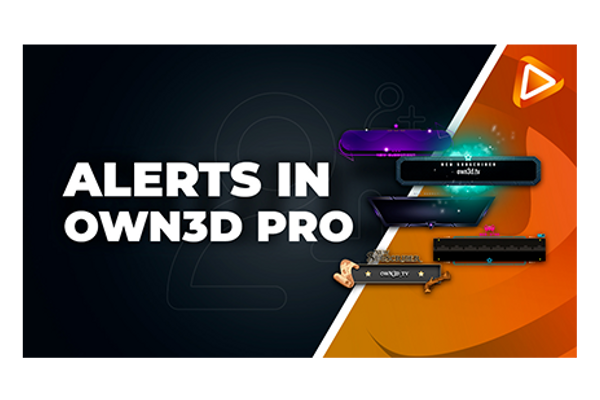
Uploading animated alerts in OWN3D Pro
Now we will add your animated alerts from the Stream Overlay Package to OWN3D Pro.
To do this, register on OWN3D Pro or log in to OWN3D.pro with your credentials if you have already registered. You will find your alert settings in the dashboard in Alerts -> Configure. You can change each alert individually by clicking on the various gears. In this example, we are customizing our Follower Alert.
So we click on the cogwheel at Follow. On the right side, the settings for your follower alert will open. Click on “Advanced Settings.” Under the "Image" setting, you have the option to add your video file from your alert from the "Animated-Alerts" folder. Click on "Change file": you will now be taken to your media library.
Look for “Upload files” next to the media library menu item. This is where you can upload your alerts from your Stream Overlay package’s "Animated-Alerts" folder. You can select any alert of your choosing directly from the unzipped folder and drag them into the field. Alternatively, click "Upload File" and navigate to the unzipped folder of your complete package in Windows Explorer. Select the corresponding .webm files from the "Animated-Alerts" folder.
In this example, we chose "rodan-alert-follower", "rodan-alert-donation", "rodan-alert-cheer" and "rodan-alert-subscriber" and some others for our alerts on Twitch.
You will be automatically redirected to your media library after uploading the files. Now you can make your selection: click on our follower alert and on "select file". You have already included your animated alert video file for followers. OWN3D Pro will automatically save the changes you’ve made to the alerts.
Include alert sound in OWN3D Pro
This lesson will teach you how to add your alert sounds from the Stream Overlay package to your OWN3D Pro alerts.
If you are not yet registered for OWN3D Pro, please log in or register on OWN3D Pro.
You can customize the alert sounds in the OWN3D Pro dashboard in Alerts -> Configure. You can change each alert individually by clicking on the various gears. In this example, we are customizing our Follower Alert.
The settings for your alert will now open. There you can upload and save your sound under "Sound". Click on "Change file" to get to your media library.
Look for “Upload files” next to the media library menu item. This is where you can upload your alerts from your Stream Overlay package’s "Alert-Sounds" folder. You can select any alert of your choosing directly from the unzipped folder and drag them into the field.
Alternatively, click "Upload File" and navigate to the unzipped folder of your complete package in Windows Explorer. Select the corresponding .webm files from the ”Alert-Sounds” folder.
In this example, we upload all sounds for our alerts on Twitch. (You can, of course, mix and match: use the host sound for followers, or any other combination, if you’d like!)
You will be automatically redirected to your media library after uploading the files. Now you can make your selection: click on our follower alert sound and on "select file". You have already included your animated alert sound for followers. OWN3D Pro will automatically save the changes you’ve made to the alerts.
Further customization options for your alerts
In this chapter, we'll show you what else you can customize in your alert by going through the follow settings in further detail. Keep in mind that all changes made will be saved automatically!
The first section lets you change the alert title. In this example, we only want to show the username, so we leave it as the {​{name}​} string.
The “Alert Message” section lets you display a small notification below the alert title, for example, "Thank you very much!” or something like that.
If you want a message to be posted in the chat when a new follower is added, you can define it under "Chat Message". If you don't want to have a message, leave the field empty.
If you want to separately control the volume of your alert, you can also adjust it here. Keep in mind that the setting will only affect this specific alert. If you want to have the same volume for all alerts, you can adjust the overall alert volume with the "Standard" setting by clicking on the cogwheel.
"Alert Image Style" offers three stylistic options: the video or image can go above, behind, or left of the text. In this example, we place it behind the text, banner style.
Next, we can change font size, font style, font color and the highlight color (of {​{name}​}, in our case).
At the end of the list, you will find the alert animation and alert duration settings.
Creating alerts variations
You can also create different variations of your individual alerts. To create a new variation, simply click on the "+" above the alert settings. Name your alert variation and set the conditions when the variation should be triggered.
Different conditions are available for all alert variants (except for Follow). Click on “Save” when you have your conditions set. Now you have a new variation, and you can adjust its settings separately.
You can change each alert and each variation in the same way with the steps mentioned before. There are no limits to your creativity: for example, you can create variations for a raid alert with more than 10 people, another with more than 50 people… this way lets you celebrate each raid differently.
Activate and test your OWN3D Pro alerts
If you want to make sure that your alerts are active, click the slider at "Activate Alerts" in Alerts->Configure on the slider of your desired alerts. If the sliders are green, your selected alerts are activated, and they will automatically trigger when new events occur.
Want to know what your alert looks like before it goes live? Clicking on the Test button next to the Activate alerts slider will give you a list of all alert variants from Follow to Host. You can directly test your activated alerts here to see how it looks in the dashboard. If you then want to change something, just adjust the settings accordingly.
All you have to do now is include it in OBS Studio so that it is also displayed in the stream: we will show you how to do this in the next lesson of this chapter.
Integrate OWN3D Pro alerts into OBS Studio
In this lesson, we will add your OWN3D Pro alerts to OBS Studio.
You will need the OWN3D Pro tool in OBS. If you don't have the OWN3D Pro Streaming Tool installed yet, download the tool and follow the installation instructions. If you need help with this, here is a chapter on how to install OWN3D Pro for OBS Studio.
Once you have installed OWN3D Pro, open OBS Studio, hover your mouse over the "Tools" menu item and click on OWN3D Pro. If you are not logged in yet, log in to the OWN3D Pro window with your OWN3D Pro credentials. You can now close the OWN3D Pro window.
Now you can add the source "OWN3D Alerts". Click on the "+" in the selected scene in the "Sources" dock and on "OWN3D Alerts".
The "Create/Select Source" window appears. Here you can either create a new source or insert an existing one into your scene. This means that you can directly add a source you’re already using in a different scene to this one (via the “Add existing” list) without having to set it up all over again from scratch. Name your new source (e.g., "OWN3D Alerts") and then click on "OK."
Alert properties
The properties window of your alerts will now open. Here, all you need to set is the size, as everything else is controlled from the dashboard. Set the size and click on "OK".
Moving your alert source in the live preview
To make changes to your media source in the live preview, you can either directly click on it on the video screen or by selecting it from the “Sources” dock. A red frame will appear around it in the live preview. You can move it across the screen by drag-clicking on the source.
Testing your alerts in OBS Studio
If you now test your alerts in your OWN3D Pro dashboard, as we showed you in the previous lesson, your alerts will also appear directly in OBS Studio. This lets you test them in the live preview to figure out how they will look on stream and whether they’re in the right place.


