OWN3D.tv

Shopping Cart (0)

Your cart is currently empty

Stream Designs

Premium Stream Designs for Twitch, YouTube, Facebook and Discord!

Stream Overlay Packages
Stream Alerts & Alert Sounds
Panels
Emotes
Stream Banners
Sub Badges
VTube
More Stream Design Elements
Create Your Own

Create custom and unique designs for your stream. It´s easy and fun.

Tools

Explore our tools to elevate your stream

OWN3D Pro modular package setup guide
OWN3D Blog Tutorials How to insert animated transitions
OWN3D Pro modular package setup guide
Tutorials

How to insert animated transitions

Your OWN3D.tv stream overlay package contains a folder called “Animated-Transition.” This is where you will find the video files you need for an animated transition between your scenes. They are also known as WEBM files. Depending on the package you've purchased, they may or may not include sound effects. You can add these transitions directly to OBS Studio.

Mela

Mela

Posted at October 7, 2022 · 3 minutes to read

Downloading and unpacking your stream overlay package
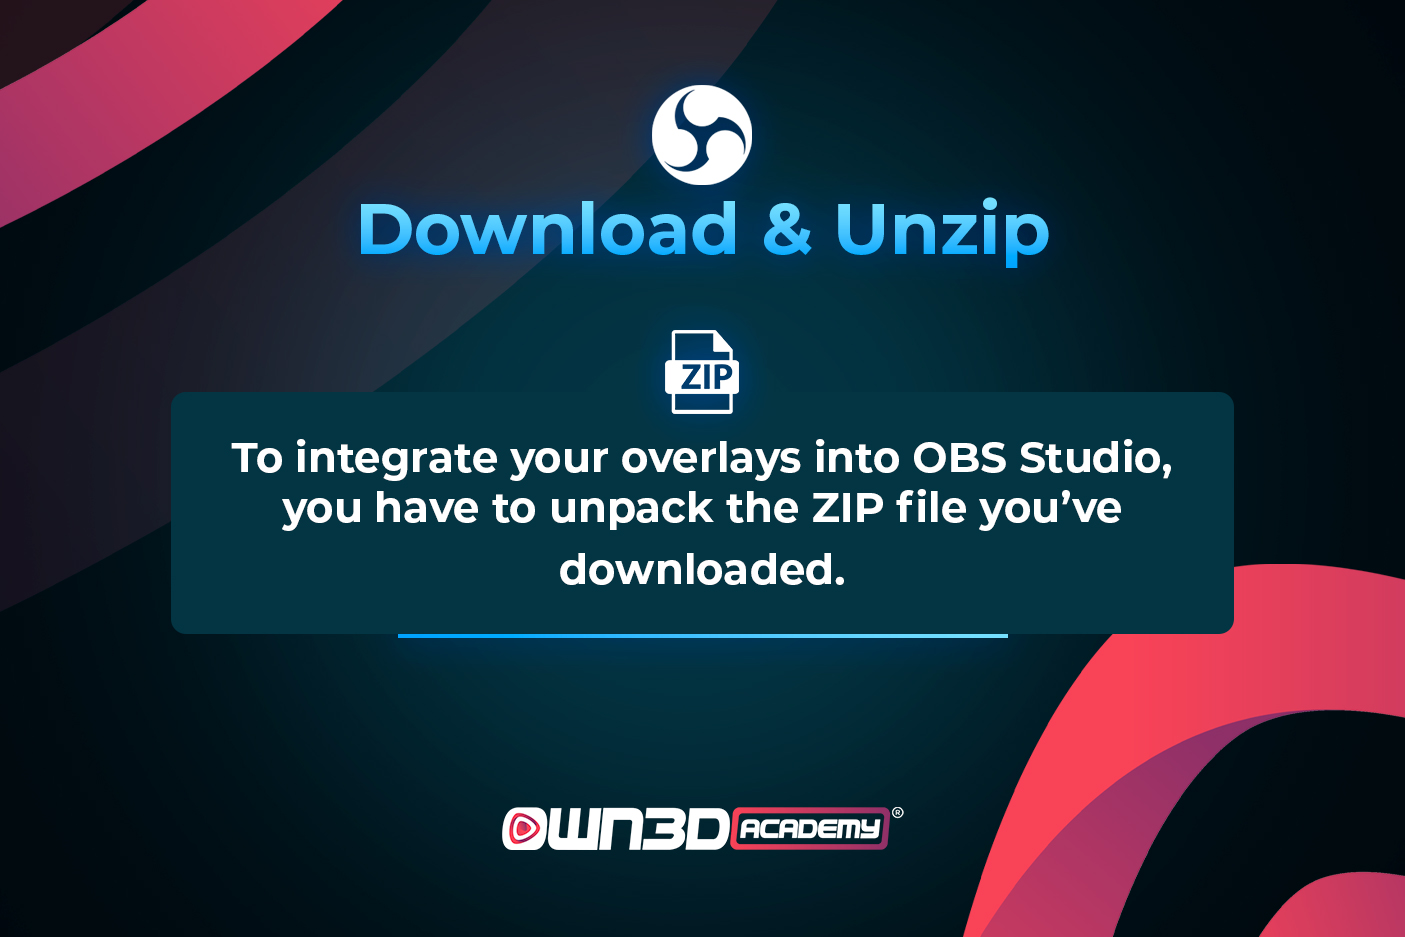
1. OWN3D-tv-Setup-course_ENG_overall lessons-Download and Unzip (1).jpg

If this is your first time downloading and unpacking your complete OWN3D.tv package, this chapter is for you. If you have already done this, feel free to skip to the next one!

First, you have to download your OWN3D.tv package. Move your mouse over your profile icon next to the shopping cart on the OWN3D.tv website, and a menu will open. Click on the "My downloads" button. There you will find your purchased package. You can select the language of your choice by clicking on the flag symbol before downloading it. Be sure to remember where you save it on your PC, as you will need it right away!

Now you have to unpack your complete OWN3D.tv package. There are several free software that you can download online. We recommend 7-Zip or WinRAR. Install one of this software so that you can extract the contents of the package.

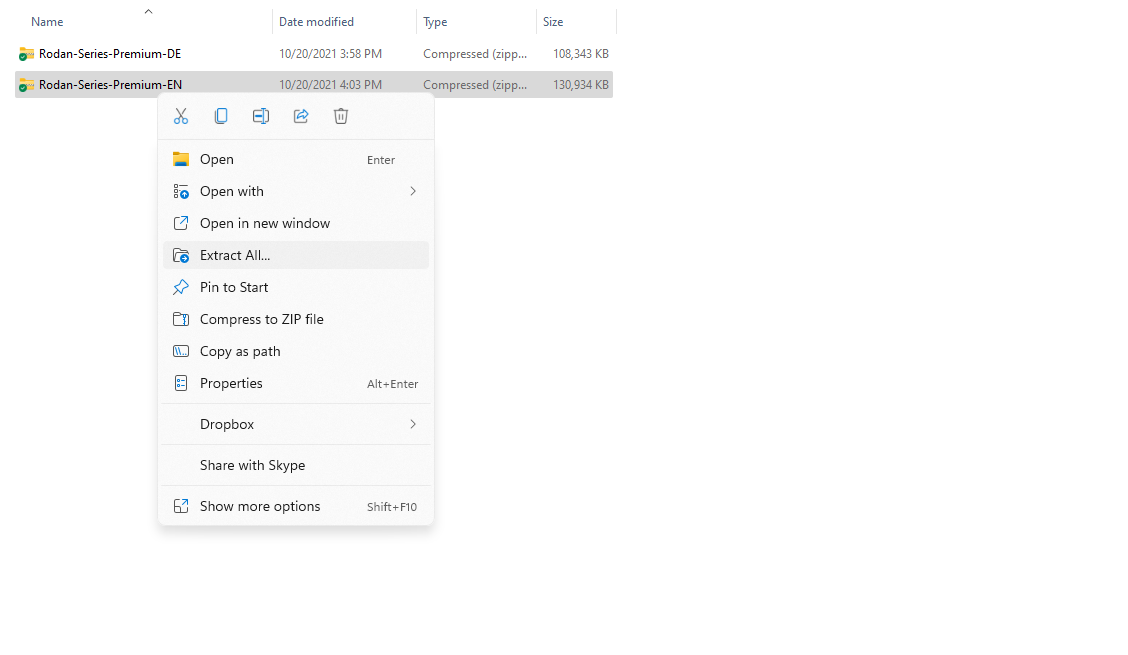
Right-click on your downloaded file to open the Windows menu. Click on "Extract All...". - a window opens where you can select a destination folder for the extracted ZIP folder. If you leave the default selection, the program will save the extracted files directly into the same folder where your ZIP file is located. If you want to select a new folder, click on "Browse" and choose your desired destination path.
01.OWN3D-tv_OBS_ENG Extract.png

Once you have defined a destination folder, click on Extract. It should be done in just a moment.

Adding the transition to OBS Studio
04.OWN3D-tv_OBS_ENG transition properties.png

This chapter will teach you how to add an animated transition between your scenes to OBS. If you have not yet created a scene collection or scenes, you will find instructions on how to do so in this chapter.

Your OWN3D.tv stream overlay package contains a folder called “Animated-Transition.” This is where you will find the video files you need for an animated transition between your scenes. They are also known as WEBM files. Depending on the package you've purchased, they may or may not include sound effects. You can add these transitions directly to OBS Studio.
01.OWN3D-tv_OBS_ENG transition choose.png

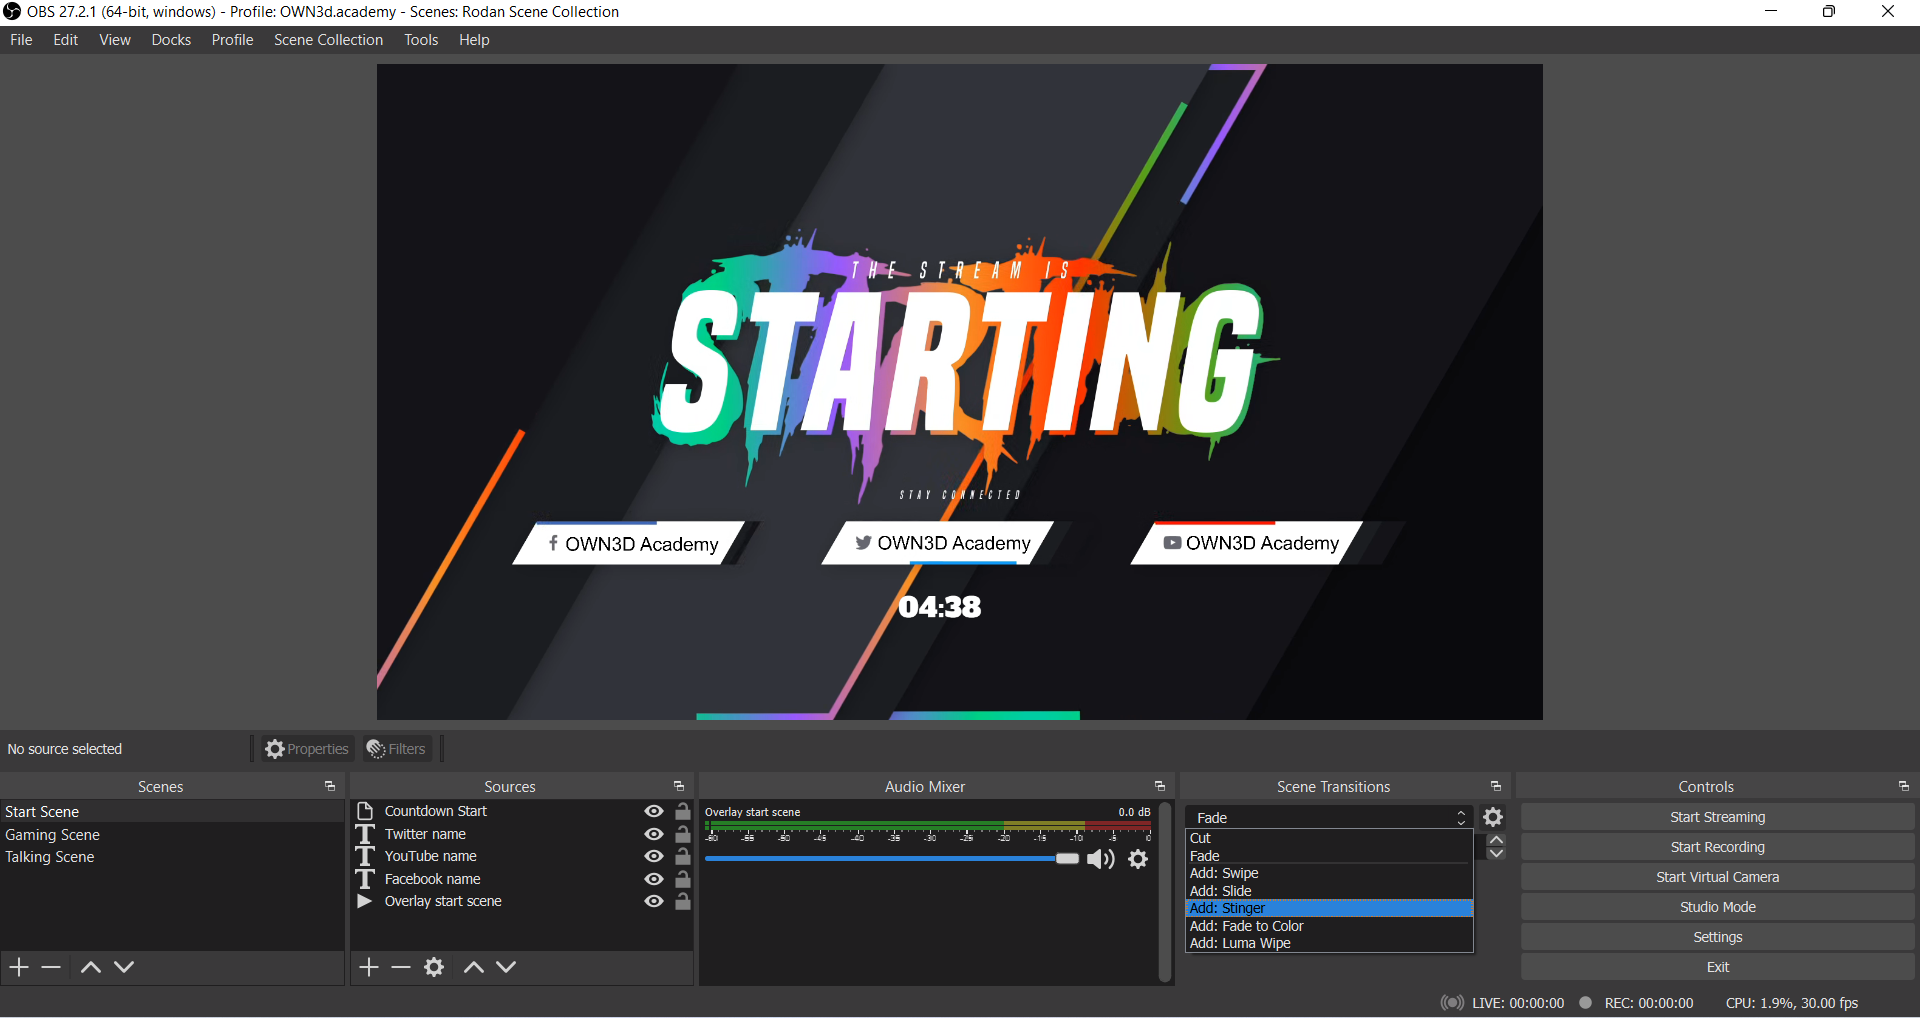
Look for the "Scene Transitions" dock. The “Transition” list will offer a selection of different transitions. There are multiple options available here, but the animated transitions in your complete OWN3D.tv package were built around a specific one, so that is the one you should select. Since the transition is a "Stinger," select "Add: Stinger."
02.OWN3D-tv_OBS_ENG transition name.png

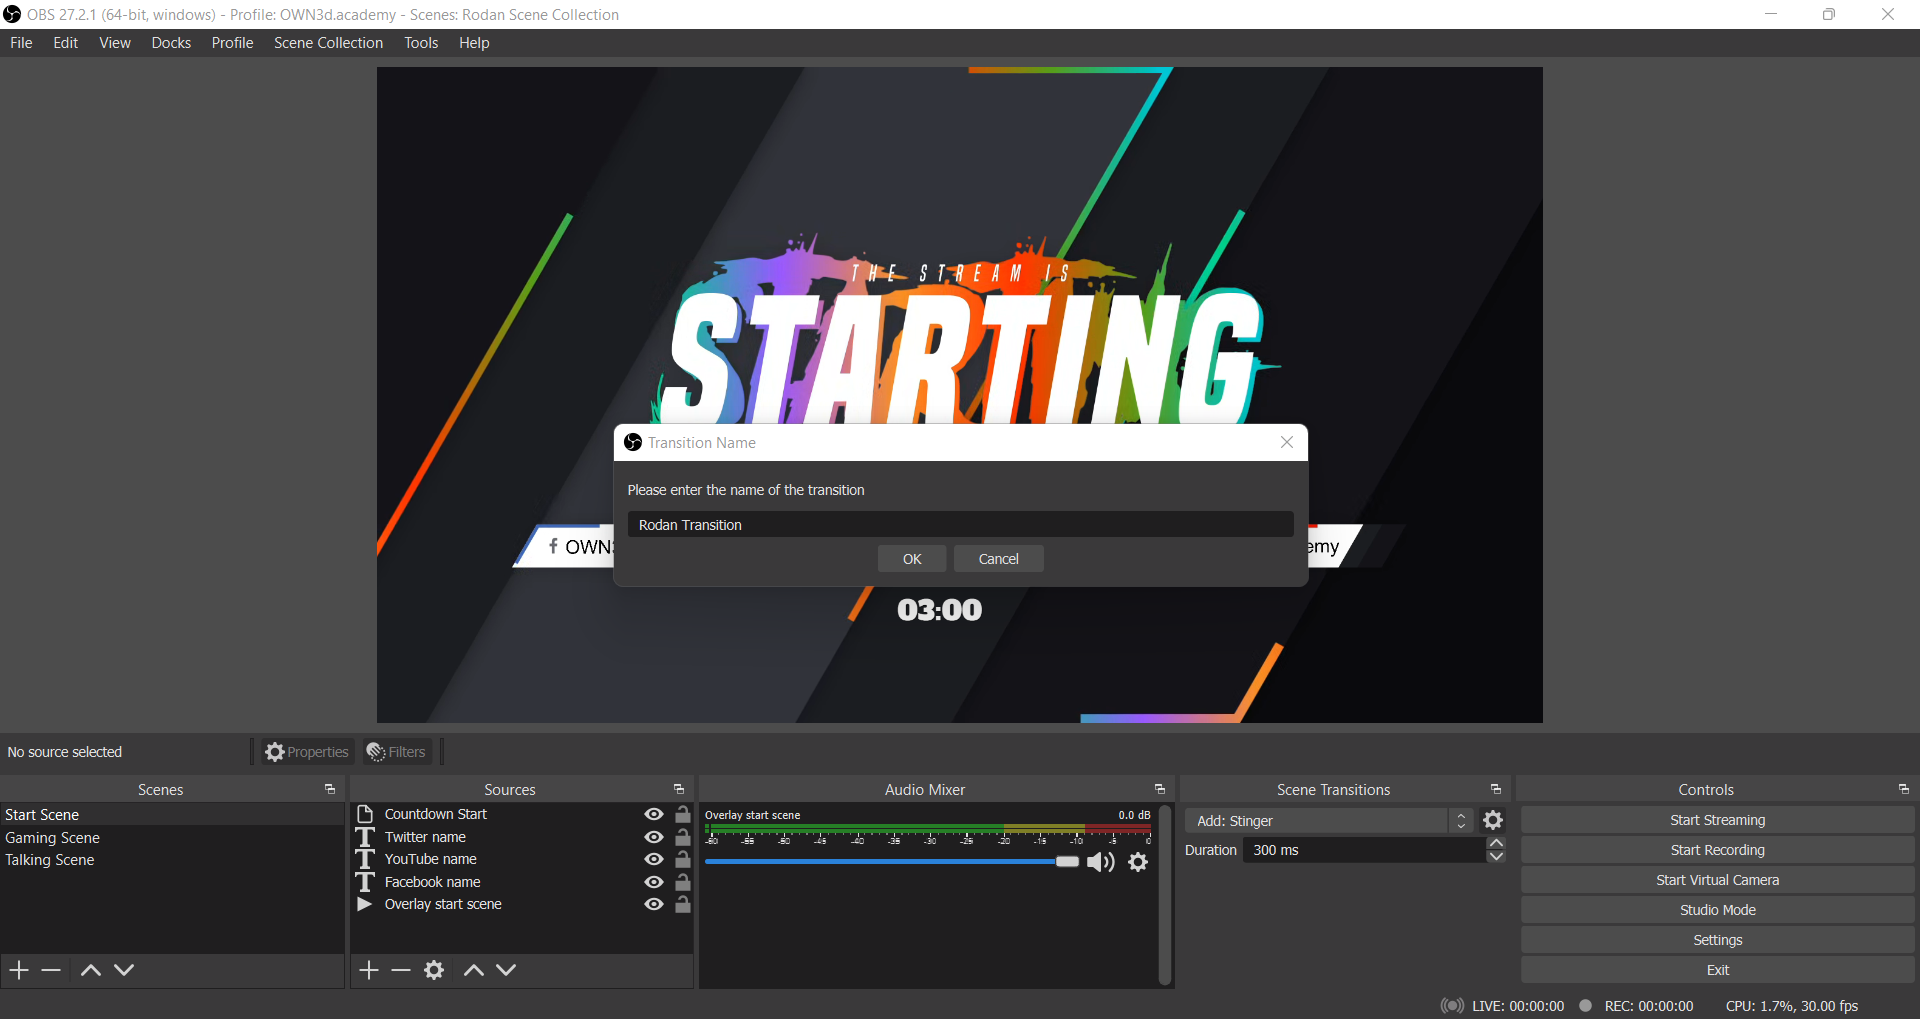
Now you need to name your transition. In this case, we will name the transition "Rodan Transition" and click "OK."

Transition properties

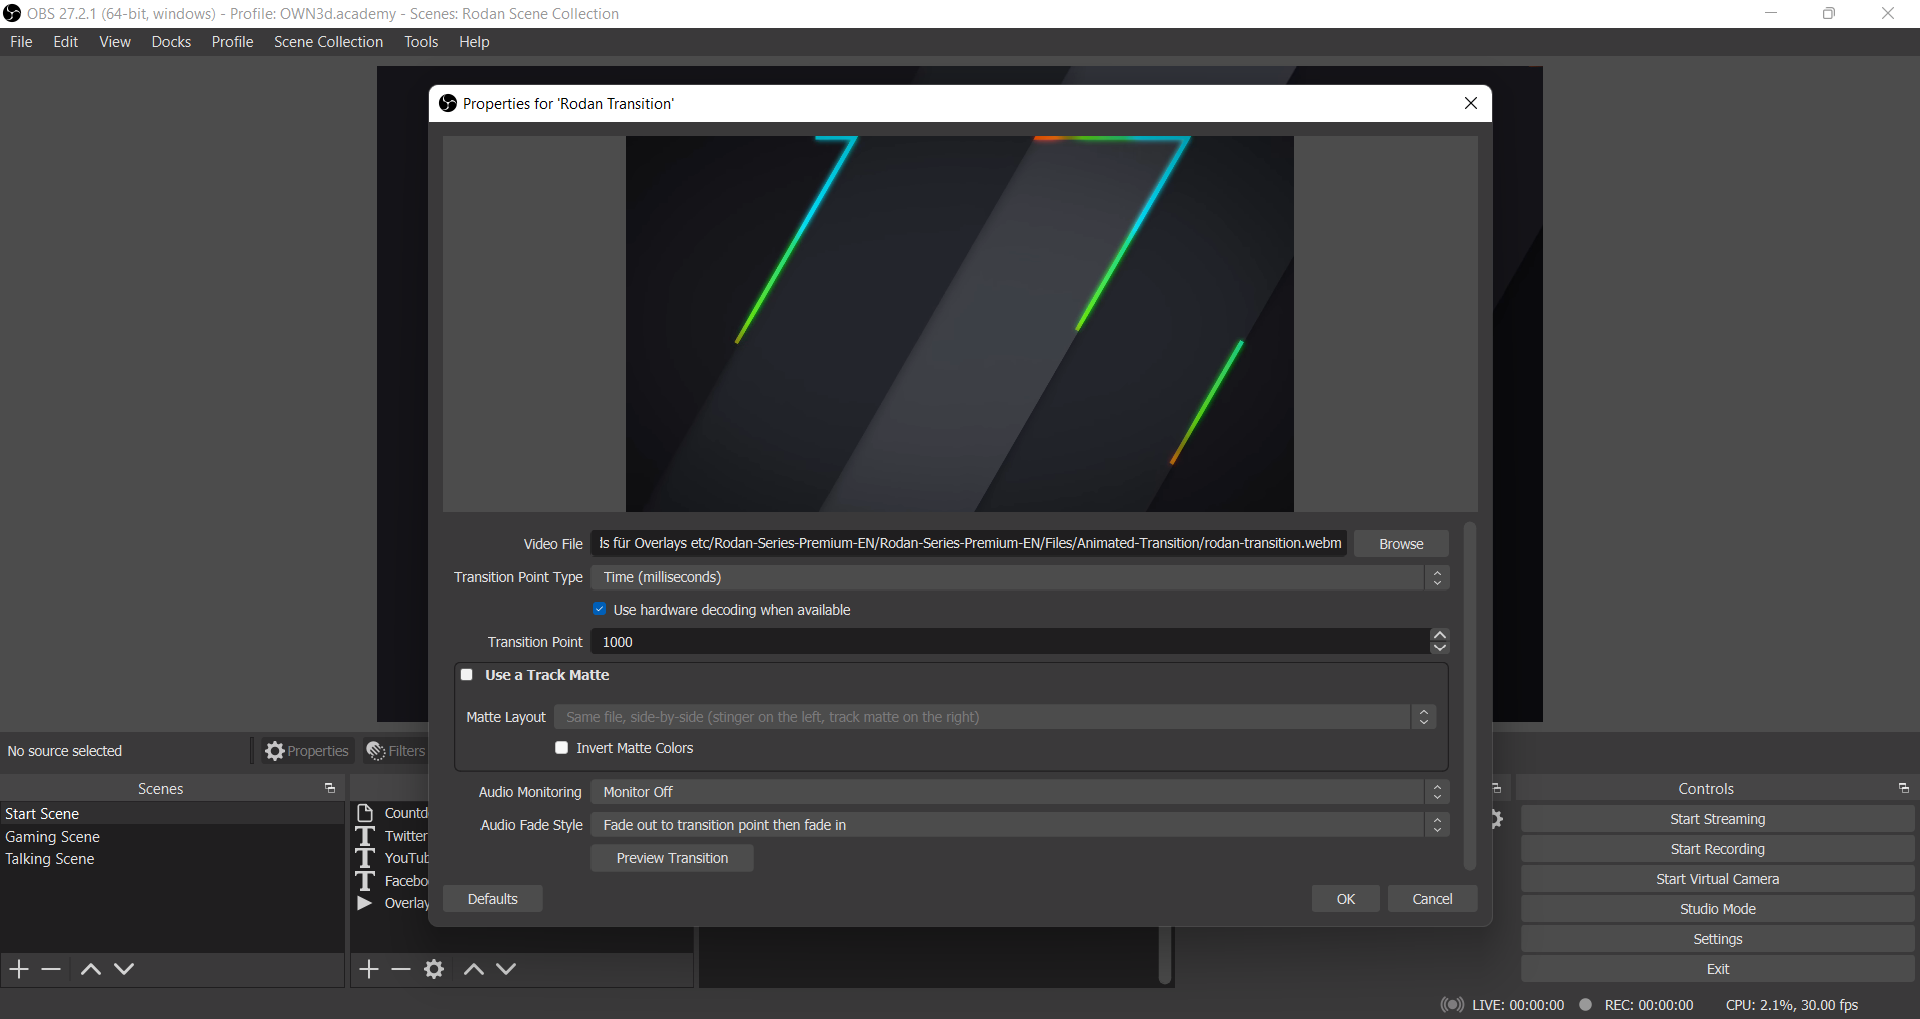
This will take you to the properties window of your new transition. This is where you will add the WEBM file. Click on the "Browse" button on the right side of "Video File." A Windows Explorer window will pop up. Navigate to the unzipped folder of your complete package and select the desired .webm file from the "Animated-Transition" folder. Since we’re currently setting up a start scene, we choose "rodan-transition."
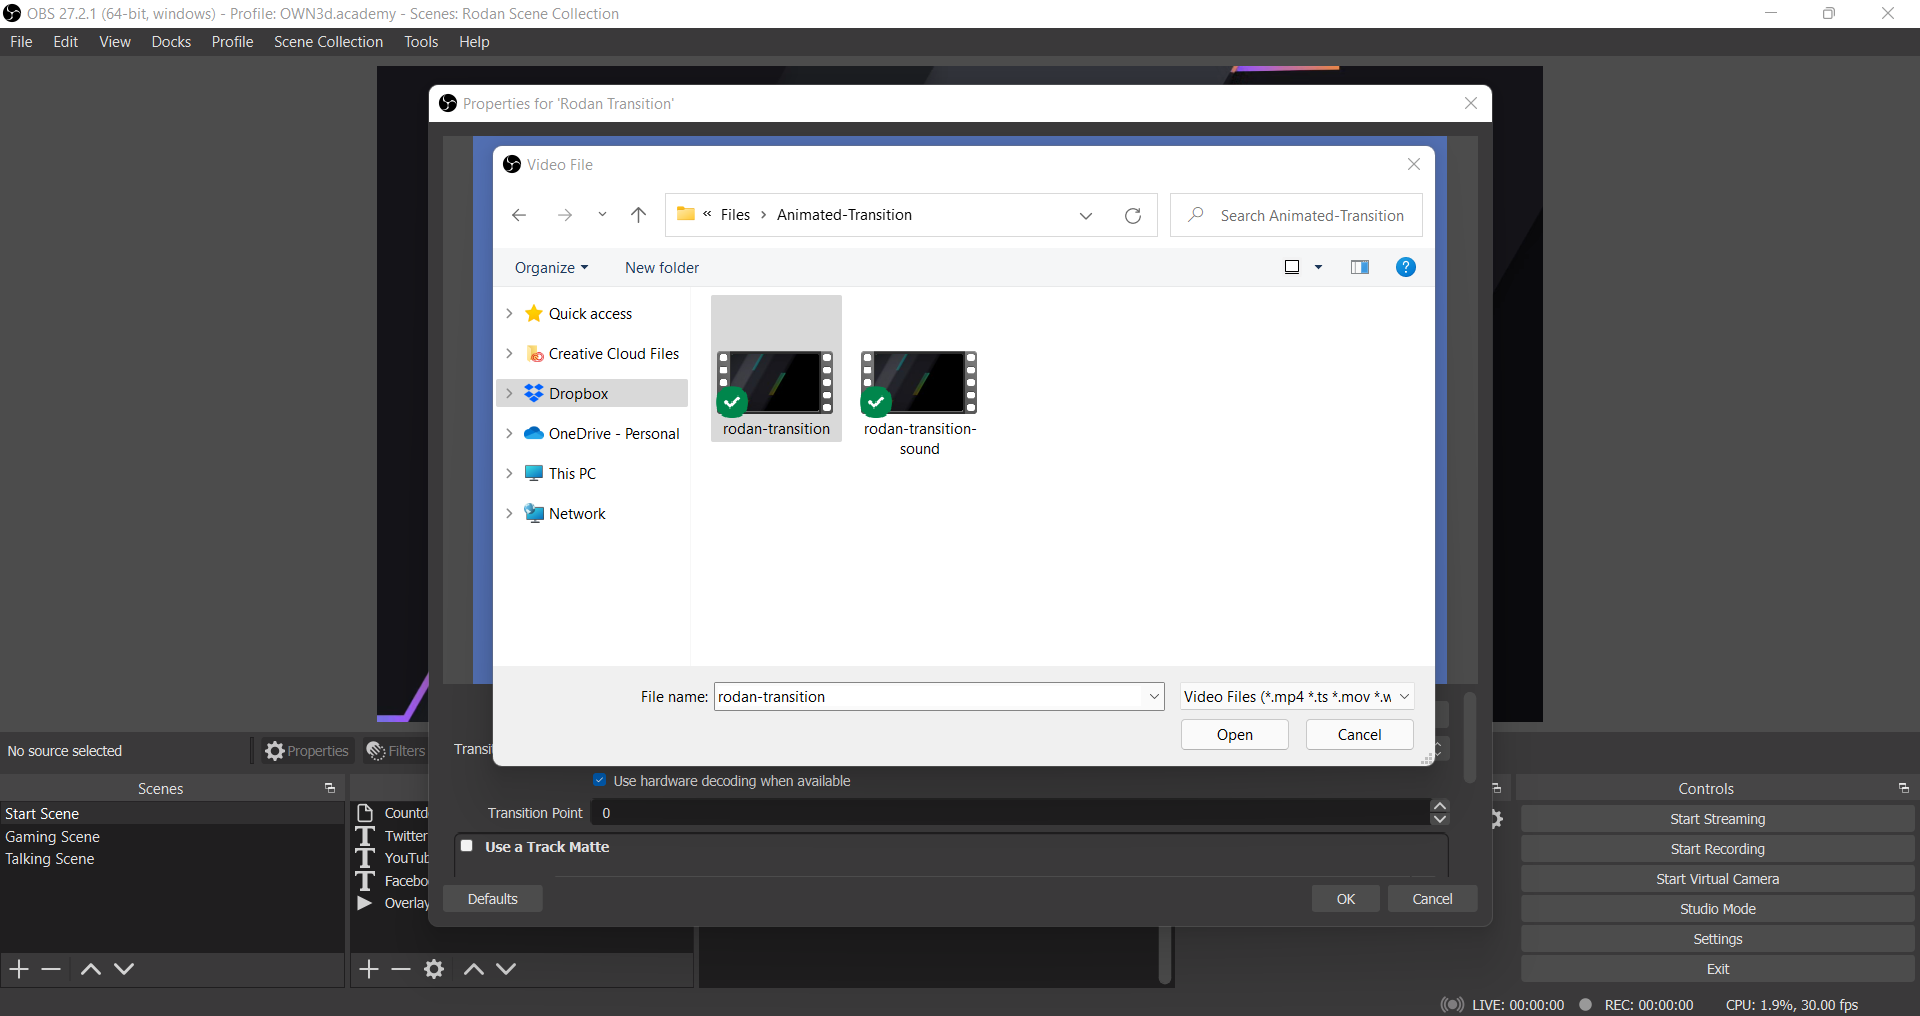
03.OWN3D-tv_OBS_ENG transition explorer.png

Set the “Transition Point” to the desired time in milliseconds. This may differ depending on the package you’ve purchased.

Make sure to play around with it and test the transition between the two scenes! Set the time and press "Preview Transition". You will see how your scene transition will affect the scenes. In this example, we will set it to "1000" milliseconds, as this gives us the perfect transition effect.
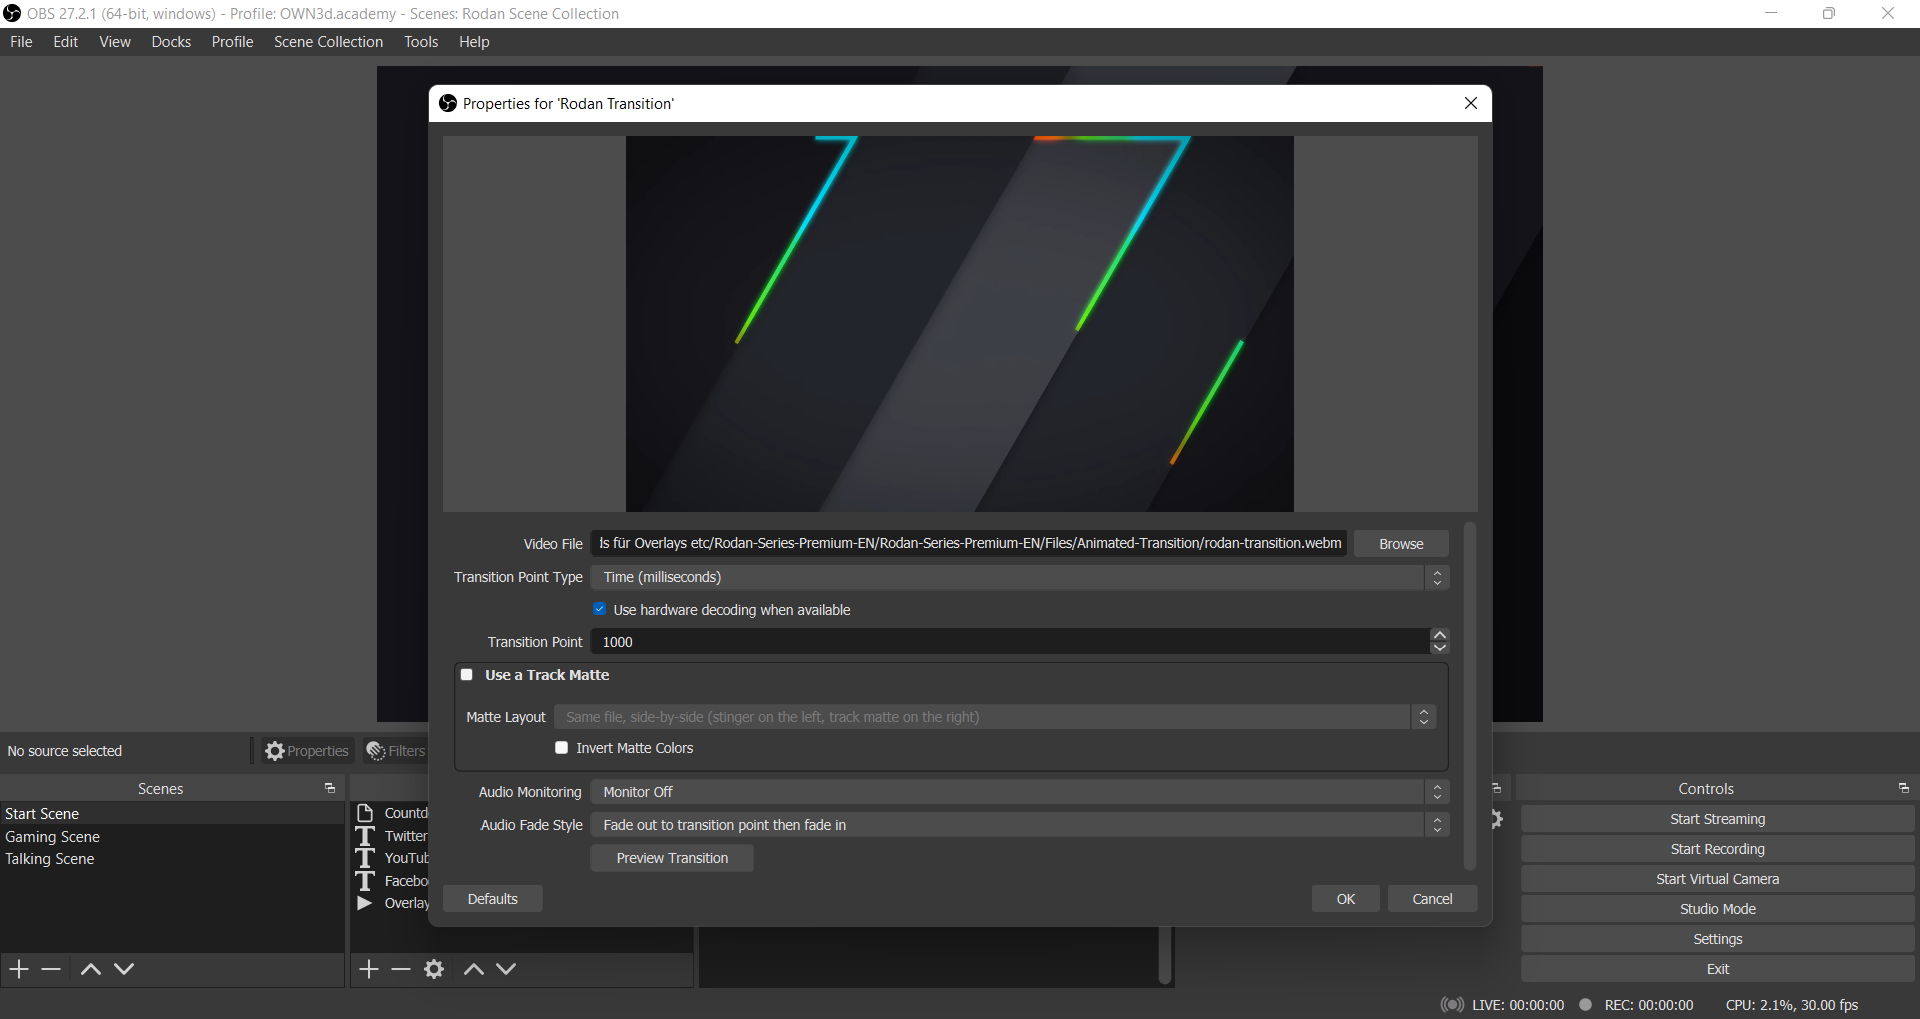
04.OWN3D-tv_OBS_ENG transition properties.png

You can leave the rest of the settings as they are: click "OK," and you’re all set!. If you now switch back and forth between the scenes in OBS, you should immediately see your new transition.

If you want to adjust or change your stinger again, click on the gear wheel in the "Scene Transitions" dock and click on "Properties." This will take you back to the properties window, where you can make any adjustments needed.

Mela

Mela

Editor & Content Manager

Lil streaming nerd. Love to write, research and read everything about streaming (especially Twitch)! 🥰

The greed for more posts? Continue reading…

Get a professional look with the OWN3D.tv Premium Stream Overlay package
Tutorials
Get a professional look with the OWN3D.tv Premium Stream Overlay package

If you’re looking for an ideal all-in-one solution for your stream graphic needs, OWN3D.tv’s stream overlays and designs are just the right thing for you. These graphical packages let you personalize your channel while also giving out a professional and appealing vibe. No matter what kind of tone you’re looking for, you are guaranteed to find the perfect design on OWN3D.tv.

Read more »
How to create scenes in OBS Studio!
Tutorials
How to create scenes in OBS Studio!

The OWN3D.tv design packages were created with easy integration in mind: the formats and file sizes are all properly set, so you will only need a few clicks to add them to your stream. The process is very straightforward and can be explained in just a few steps.

Read more »
Animated Intermission Banner Setup: A guide | OWN3D
Tutorials
Animated Intermission Banner Setup: A guide | OWN3D

Your complete OWN3D.tv package contains a folder called "Animated-Intermission-Banner." This is where you will find the video files you need to set up a start, pause or end scene - these are also known as WEBM files. This lesson chapter will show you how to insert the start scene’s WEBM file ("rodan-intermission-starting") as a source in OBS.

Read more »
How to insert animated label overlays!
Tutorials
How to insert animated label overlays!

Your complete OWN3D.tv package contains a folder called "Animated-Overlay." This is where you will find the video files you need the animated design elements like "Last Follower", "Last Donation" and so on. They are also known as WEBM files.

Read more »
How to Integrate animated webcam overlays!
Tutorials
How to Integrate animated webcam overlays!

Your complete OWN3D.tv package contains a folder called "Animated-Webcam-Overlay." This is where you will find the files you need to add an animated frame to your webcam in your stream overlay.

Read more »
How to install animated talking banners!
Tutorials
How to install animated talking banners!

Your complete OWN3D.tv package contains a folder called "Animated-Talking-Banner". This is where you will find the video files you need to set up a scene with gameplay, chat, webcam and labels - these are also known as WEBM files. The package provides several choices of talking banners. Which one you choose is entirely up to you.

Read more »