


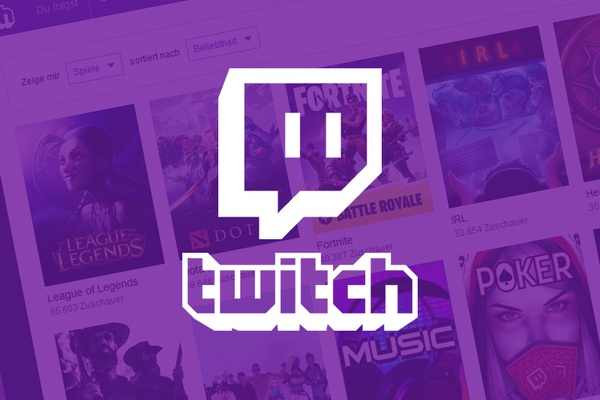
If your curiosity has been sparked by Twitch, then look no further. We’ll guide you through the simple steps needed to set up and get going.
We are here to provide full support for beginner content creators like you. The OWN3D.tv team understand that for little fish, jumping into the cyber Stream is an exciting but often scary experience. Don’t be afraid. We’re going to teach you how to dive deeper in this ultimate guide.
By the way, OWN3D.tv is opening an Academy to train Twitch streaming beginners from scratch. No matter what your questions are, we are here to assist you in every way.
1 How to Go Live on Twitch
Although anyone can login to Twitch, create an account and immediately start Twitch streaming, it’s unlikely that you’d get many viewers at first. This is because Twitch has more than 9 million channels. And the most popular streams have over a million viewers. But don’t be daunted. With a bit of solid preparation you have every chance to be a popular streamer. And, move forward to become a Twitch ‘Affiliate’ and then a full ‘Partner’.
Please keep reading. We have some essential advice for you here. Don’t jump in before you read this guide. (Be Wary little Fishy)
1.1 Read the ‘How to Stream on Twitch’ Guidelines first!
Before taking the first step on Twitch, you should definitely read the community guidelines of the purple streaming platform. The Twitch Community Guidelines are laid out very clearly.
The first thing to know is: Don’t enter the ‘Shark Tank’ without recognising that hate speech, any kind of discrimination against viewers, or playing unlicensed music is prohibited. Absolutely. Twitch will ban or suspend you channel for any violated rules or copyright infringements on music or video. You’ll receive a report from Twitch to highlight where you went wrong after your stream is taken off air.
And you’ve got to stick to a dress code. Yes. Of course dudes! There are standards on this very public platform. No nakedness please! Consider covering up with an awesome T-shirt with your avatar or brand logo on it.
We highly recommend that you take the time to look carefully through these guidelines for good practice. This is for your own protection (as well as anyone else’s). Learning how to go live on Twitch begins with learning the basic social norms.
Meeting presenters and viewers online is a very real experience. And, of course, you’re interacting with real people. Therefore it’s important to act with consideration for others. For example, If you don’t behave well in the chat stream, it's entirely possible that a moderator could time you out. Or, you may be banned until such time as a mod cares to unban you.
1.2 Create a Twitch Streaming Account
1.2.1 Registration or Signup
To register simply Login to Twitch.tv on your device. You can do this very easily on a smartphone, tablet, laptop or on your computer browser. At the top right of your browser find the “register” button and click !
(If you are operating from your smartphone, simply download the Twitch application and follow the signup or login instructions.)
1.2.2 Create a Cool ‘USERNAME’
Your next step is to select a cool username that will get you recognised. This will help others streamers to get to know your online personality better. And live presenters are going to call out that username over the airwaves. Make it pronounceable please, for everyone’s sake!
Also, make sure that the username is legible, describes who you are, and what you truly represent. Be as clear as you can be about yourself.
Warning! If you put a string of random numbers, you will most likely be dismissed as a bot or ‘incredible. Remember that Credibility in Cyberspace is where it’s at! Learning how to stream on Twitch is a lot about learning what not to do!
Also make sure to check that the name you have chosen is available on your social media platforms - you don’t want to be confused with someone else … (however famous or infamous).
1.2.3 Create a STRONG Password
You’ll be asked to add your email address, date of birth and a strong password. Then all you need to do is to click ‘Register’ and you’re done. You will then be guided to confirm your email address on Twitch in your personal mailbox. A 6-digit code will be sent to your email address. You will then be asked to enter that code in your Twitch application (or browser window) in order to verify your account.
1.2.4 Enable 2 Factor ID Protection for Twitch
Streaming Safety is everything online. Protect yourself with 2FA authentication. To do so, go to the ‘Security and Privacy’ Tab in your account settings. This means that every time you login to Twitch, a security code will be sent to your mobile number (or Authy app) to confirm that it is you really (and not your alter ego ) logging in.
1.2.5 Coordinate your Design Elements
In order to have a good overall professional “look” on Twitch, it is important to coordinate your twitch streaming design elements. Make sure you follow through with your colour scheme, font and overall design themes. A smart looking channel will help to attract followers to your stream.
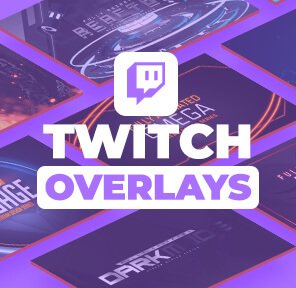
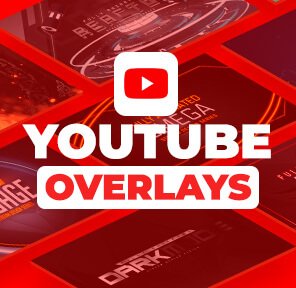
At OWN3D.tv you can find awesome overlays, panels, alerts, subscriber badges and emotes to spice up your stream on Twitch. Choose from 200+ premium template packs for OBS, Streamlabs, Streamelements, Facebook or Youtube.
In case you are a bit puzzled as to what these terms mean, we’ve put together a short explanation of these terms for you here:
- Overlay
A Twitch overlay is a graphic design that frames (or overlays) your footage during a stream. Examples include webcam frames, your streaming schedule, bar overlays with text, stream alerts, screens and transitions.
- Panel
Panels are boxes or graphics tat appear below your live stream in your viewing profile on Twitch. They will make your stream look more lively and active. OWN3D has 100+ twitch panel sets which are preset with buttons to get your audience to donate, follow you on social media, or look at your schedule and much more.
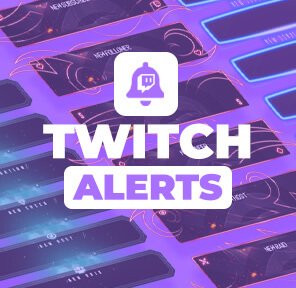
- Alerts
Twitch Stream Alerts notify your viewers when you are going to go live. They also help to improve the chat experience.
- Subscriber Badges
When someone subscribes to your channel, they will earn a subscriber badge that’s displayed next to their name when they join in the chat.
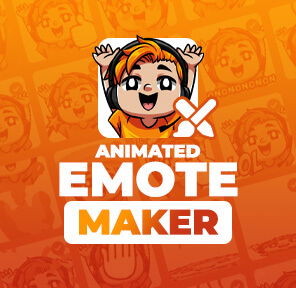
- Emotes
Emotes are the language of Twitch. When you progress from beginner to Affiliate level it is possible to offer your channel subscribers a selection of unique and expressive emoticons that describe feelings and more in ways that words cannot. Have fun making your own emotes that reflect your brand colours and design here!
1.3 Create a Twitch streaming Profil
1.3.1 Profile Image and Banner setup
Choose a compelling profile image for your account. Think of something that identifies you in an unmistakable way. For example, upload a fab photo of yourself - or your avatar? Use your brand logo and choose your colour scheme.
Then navigate to settings where you can upload that image to you profile. The same process applies to inserting a banner - find an image or a logo that informs viewers and hosts about who you are.
If you’re looking for something super cool and out-of-the-box, OWN3D.tv offers awesome customisable banners and profile pics - don’t hesitate to appear amazing. Or go one step further and create your own avatar with our Avatar Maker. We have an awesome range of Manga templates … and much more for you to delight in.
1.3.2 Your BIO SETUP
Here is your opportunity to introduce yourself to the entire planet (in under 1000 characters). Be brief, be succinct and be clear. Tell your potential viewers a little bit about yourself and what they might experience on your Twitch streaming channel.
We highly recommend that you do not go overboard and try to sound too eccentric (or excessively funny). It is important that your viewers, and the streamers that you watch, experience authenticity. Because things can get weird in cyberspace … And your transparency will be valued.
Explain to viewers what kind of content they can expect on your stream in a few sentences - and remember that you will have the opportunity to go into further detail in the panels.
2 How to Stream on Twitch with Broadcasting Software
We highly recommend that you spend time exploring broadcasting software. There are many options that may benefit your viewers specifically and varied ways that you can use the tech to personalise your stream to your liking.
OBS Studio
The Open Broadcaster software: OBS STUDIO is a powerful open-source project built by a community. It was developed in 2012 and has since established itself as a No.1 provider. It’s free to use and it can be downloaded to Windows, MacOS or Linux.
OBS Studio enables you to stream to Twitch, YouTube and other platforms. It also gives you the option to make simple recordings to upload to your channel, without actually having to go live.
The Open Broadcaster software can be adjusted to suit your needs and your hardware through multiple settings options. In addition you can create different scenes that allow you to include overlays and more.
OBS Studio is relatively easy to use, even for non-professionals. Click here to find a comprehensive video tutorial on how to start streaming on twitch with this software.
Top 5 Twitch Streaming Software Solutions
1. OWN3D PRO / OBS
Now it's getting ingenious! May we introduce? The Swiss Army Knife for your stream: OWN3D Pro! The extension for OBS Studio is installed within minutes and ready to change your stream forever.
Become an absolute streaming pro and join the ranks of the great streamers of our time with unique designs and sounds. Whether you want clean lines or a colorful cyberpunk atmosphere, once you've added OWN3D Pro to OBS Studio, YOU choose the design that best suits your stream. And what is especially interesting for you: The look of your stream can be activated, deleted or changed with just one mouse click. All you have to do is to click through the clearly arranged library of overlays & alerts of OWN3D Pro. You like one overlay in particular? With OWN3D Pro's innovative 1-click system, you can magically give your stream a new look. Customize your stream labels to your taste and show that your stream not only has great content, but also a design to match.
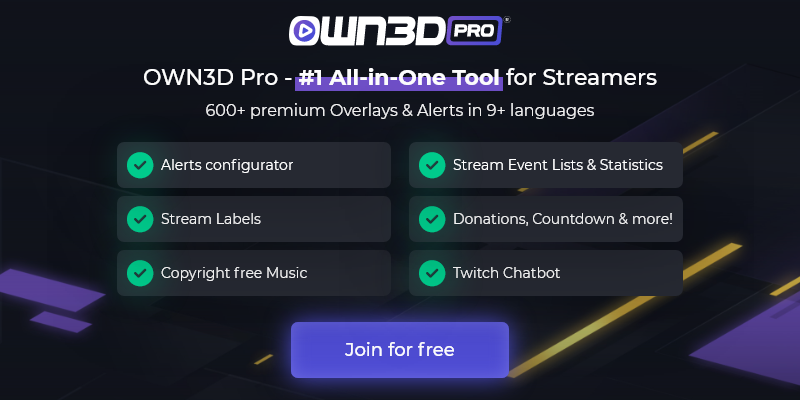
To complete the experience for you and your viewers, OWN3D Pro also offers you many other features such as the use of royalty-free music, the integration of a Twitch chatbot or the creation of a personalized donation page that matches your stream design. This way, your viewers will be encouraged to support you even while donating.
During the development of the plug-in, we placed particular emphasis on usability. We want to provide our users with a flawless and user-friendly experience that will delight both streaming professionals and newbies alike! Check out the sheer feature-richness of OWN3D Pro and download it for free today.
2. Streamlabs / OBS
Streamlabs is a popular broadcasting software developed to help steamers in more ways than just technology. It enables community projects like fundraising for charities and raising donations for DJs and stream hosts.
You can use Streamlabs to personalise your Twitch panels and to set alerts and to organise your donations.
Other Features Include:
- Fast and backed up to the Cloud
- Personalised overlays
- Multistream to multiple platforms
- Global Creator Community
3. Streamelements
Streamelements is a platform providing Cloud-based tool. It basically takes care with everything to do with your streaming needs. It’s popular with music producers and hosts, because of it’s super merchandising service: including subscriptions and donations. It’s also notably popular for its chatbot and the clear stats it offers. Disclaimer: You can’t use it with iOs or iPhones.
More Features Include:
- Viewer Loyalty system
- Tipping System
- Leaderboards
4. Vmix
Vmix is a high-end live production and streaming software for PC only. It’s a completely alternate system to OBS Studio. Also, it isn’t free software but comes in 5 versions. It starts from a BASIC package which allows 4 inputs and 1 channel. You can progressively ramp up to a more costly PRO version that allows a 1000 inputs and 4 overlay channels!
This hi -tech software is popular with experienced streamers. It specialises in producing seamless content. And, in streaming and recording high quality audio and video.
Take up their offer of a free trial to see if the software suits your twitch streaming needs.
5. Xsplit Broadcaster
Xsplit Broadcaster offers itself up as “powerful live streaming and recording studio that offers limitless customisation.”
It is the most well-known broadcasting software after OBS that can be used for Twitch streaming. It offers many more advanced features like direct uploading to Skype and YouTube. But it comes at a cost whereas your OBS system is completely free.
Use their native plugins or Custom RTMP to stream and record multiple outlets in one go. You can also use browser source to add web pages designed for live streaming events. This is a really high end product for top streamers and music producers with large audiences and multiple needs.
3 How to start streaming on Twitch
Firstly, Activate your Stream-Key! To stream on Twitch you will need a stream key. This activation code unlocks your streaming software (the broadcasting software you chose to use in step 2) access to Twitch. Your software will request the stream key from you during your initial setup.
The stream-key serves as an access point for external broadcasting software. It ensures that your audio and video content is transmitted to Twitch reliably. Be super-careful not to reveal your key! Anyone with access to it can log into, and stream any kind of inappropriate content through your channel.
Follow these easy steps to unlock your stream key:
- Open a browser window on your PC or Mac. Navigate to Twitch and login.
- Click your circular profile icon on the top right hand side of your screen and choose
- ‘Creator Dashboard’ from the dropdown menu
- On the Creator Dashboard, click the gear icon labelled ‘Preferences’ on the left side of the screen. If it is not immediately visible, click the 3 horizontal lines to your top left screen. More options should now appear. Click on ‘Channel’ to reveal a page titled ‘Stream Key & Preferences.’
- Your Stream Key should now be visible. Copy it directly by clicking ‘Copy’, or alternatively, click ‘Show’ to reveal the code and then copy it manually. You can now enter that code when your chosen streaming software asks for it.
3.1 How to stream live on Twitch from a PC or Mac
- Set up your tech: microphone, camera, and lighting
- Start your broadcasting software (for macOS the only compatible choice is OBS)
- Start the game you want to stream.
- Create the source "window recording" to feed the image from the game into the broadcaster software.
- Adjust the audio settings. Double-check these! You can adjust while Twitch streaming.
- Create and check your scenes (overlays). You can learn how to include them here.
- Check all audio channels and the image again.
- Start your stream! Off you GO!
3.2 How to Stream Live on Twitch from a console
If you want to stream, for example, from your PlayStation, you can do it directly using Sony’s built-in software or you can run it on your computer. But this requires a capture card that transfers your gameplay to it, where you can enhance it using the broadcasting software before streaming it on Twitch.
And by enhance we mean overlays that make your stream look more professional and stylish in general. You can get an impression of such graphics here – we’ll get to the topic itself later.
With this constellation, you can also integrate a webcam so that your viewers can see who is sitting behind the controller. If you choose the easy way, you can press the “Share” button while the game is open and then click “Stream game”. Enter your title and off you go. Since more and more streamers are streaming on Twitch and a lot of them already exist, you should follow our recommendation to take the other, albeit more complicated, route. Compare it to starting a business: You wouldn’t start half-heartedly and only do things halfway.
You should see it the same way with streaming. If you start off the right way, you will be rewarded more extensively. Be it through more viewers, a larger community or more subscribers. Because if you have the right appearance, you will also get more traffic; this is also a parallel to a company.
What applies to the PS, works also with the Xbox. Microsoft’s console also has integrated software that can stream your gameplay directly. Below you will find a step-by-step guide on how to stream to the respective game consoles.
3.2.1 How to stream on Twitch with Playstation
With capture card:
- Start your PlayStation and your PC.
- Connect both through the capture card.
- Set up the rest of the technology (microphone, camera, lighting, etc.).
- Open your streaming software.
- Create the source "Media Source" to feed the PS image into the Broadcaster software.
- Open the Studio mode in your Broadcaster software.
- Create and check your scenes (overlays). You can find out how to include them here.
- Check all audio channels (party, game sound, music, etc.).
- Start your game on PS.
- Check the picture of your upcoming stream.
- Start your stream! Enjoy the fun.
Without capture card:
- Start your PlayStation and your PC.
- Set your PlayStation as the primary PS4 in the account settings.
- Then open "Set features available in sleep mode" on the PS4 under Power Saving Settings.
- Here, the items "Stay connected to the Internet" and "Enable powering on the PS4 from the network" must be confirmed respectively.
- Then open the menu item "Remote Play connection settings" and check the box "Activate Remote Play".
- Then download the PS4 Remote Play software on your PC and open it.
- After opening the software you can directly apply settings such as resolution (the best resolution is only supported by new PS4, eg PS4 Pro).
- To stream in good quality, a fast internet connection with a minimum upload speed of 12mb/s is recommended.
- After the settings in the PS4 Remote Play software are done click on "start".
- If everything has worked, you will receive a notification on the PS4 that a connection via Remote Play has been established.
- To stream the picture of the PS4, you only have to add another source in your streaming software (window recording)
- In the software you can then already check picture and sound - if they are as desired, then you are ready for your stream, if not only the resolution and frame rate settings in the PS4 Remote Play software must be adjusted
3.2.2 How to stream on Twitch from your Xbox
- Start your Xbox and your PC.
- Connect both via the capture card.
- Set up the remaining equipment (microphone, camera, lighting etc.).
- Open your streaming software.
- Create the source “media source” in it to feed the Xbox image into the broadcasting software.
- Open the Studio mode in your broadcasting software.
- Create and check your scenes (overlays).
- Check all audio channels (party, game sound, music etc.)
- Start your game on the Xbox.
- Check the image of your upcoming stream.
- Start your stream!
3.2.3 How to stream on Twitch from your Nintendo Switch
- Start your Nintendo Switch and your PC.
- Connect both via the capture card.
- Set up the remaining equipment (microphone, camera, lighting etc.).
- Open your streaming software.
- Create the source “media source” in it to feed the Nintendo Switch image into the broadcasting software.
- Open the Studio mode in your broadcasting software.
- Create and check your scenes (overlays).
- Check all audio channels (party, game sound, music etc.)
- Start your game on the Nintendo Switch.
- Check the image of your upcoming stream.
- Start your stream!
3.3 How to stream on Twitch with a smartphone/tablet
Not only can you stream from your PC, Mac or Gaming Console, you can also stream live using your tablet or SmartPhone. These are the steps you need to follow to set up your device:
1. Have your tablet or smartphone near to your computer or console.
2. Start up your computer / console
3. Connect both through an appropriate app, like AirDroid or TeamViewer.
4. Set up the technology connected to your PC (microphone, camera, lights, etc.).
5. Open your streaming software.
6. Create the source 'window recording' in it to feed the image from AirDroid / TeamViewer to the broadcasting software.
7. Open the ‘studio mode’ in your broadcasting software.
8. Create and check your scenes (overlays). You can find out how to include them here?
9. Check all audio channels (party, sound, music etc.)
10. Start your game or start recording with the camera on your smartphone/tablet.
11. Check the image of your upcoming stream. Start your stream!
4 How to go Live on Twitch: Helpful Hints
4.1 Choosing Overlay
A Twitch streaming overlay is a design that appears over the video footage on your screen. The best ones are awesome colourful designs that frame the edges of the screen, so as not to disturb the actual visuals being shown.
Stream overlays can include your brand logo, your name in text, or display stream information. (For example the current music track being played, or the top donators to the stream.)
Although you can simply go live on twitch without any broadcasting software at al, we highly recommend using software that offers you a wide variety of eye-catching templates. OWN3D.tv offers a stunning range of animated visual overlays that you can use to personalise your stream.
4.2 Creating a Strategy
Having a good strategy for your stream is almost as important as having a computer or console. There are two main reasons for having a strategy: firstly, it serves as a guideline and secondly it makes sure that you don’t lose motivation, especially if things are not initially going as well as you had hoped.
Set yourself some goals: a stage by stage plan to get where you want to be. Once you have started twitch streaming, your first goal is aleady achieved! The next step is to become a Twitch Affiliate.
“The Twitch Affiliate Program puts qualified streamers one step closer toward the dream of making a living from their passions. Twitch Affiliates can start earning income on Twitch while they build their audience and work toward the coveted status of Twitch Partner”
For eligibility to be an affiliate you need to broadcast at least 500 total minutes in the past 30 days, have at least 7 unique broadcast days in the last 30 days, have and average of 3 concurrent viewers or more over the last 30 days and have at least 50 followers.
Strategy planning also includes your content. You need to think about what you want to stream. If you are a gamer, our advice is to stick to one or a few select games. If you take on too many games in your streams, you are going to attract followers with different gaming interests. This prevents you from building up a homogenous community; which should really be your goal.
If you’re a musician or a juggler or planning a gardening or cooking stream, you might follow different strategies. But the idea is the same, be sure you know exactly what you are going to stream before you start. Have all your equipment set up and ready to go. Plan a series of events - and stick to your script.
In addition, think of what topics you want to stay with in the chat. (And those that you want to avoid - for example politics or sexually explicit material). It’s important to maintain strong and ongoing communication with your audience.
Decide how you are going to communicate also. Will you be typing into the chat on your phone? Will you be using a mic to reach out to your viewers? Or are you performing and need to prepare a !Speak command, so that you can hear the chat text out loud in Audio?
You might consider designating moderators (mods) on your stream. Usually these are your trusted friends who can monitor what’s happening in the chat for you. You can also ask them to keep the chat flowing with your emotes and with conversation. You might set donation goals, or decide that you want to gamble with friends.
4.3 Plan Your Twitch Streaming Times
Planning your schedule is also a part of your strategy, but we’ll mention it as a separate item. This is because planning your times properly can make a huge difference between success and failure. Strange, but true! Shark Tank Rules!
Unless you’re aleady wildly popular, with thousands of global followers, we strongly advise you to make a weekly or even monthly schedule and post it to your channel or social media pages. Your followers will be able to see in advance when you are going live on Twitch. And for how long. They can plan their own times, and make sure that they don’t miss your next stream.
We don’t advise streaming at random times. If a new follower misses your stream repeatedly, they probably will get annoyed and give up.
Create a schedule that is consistent with your daily life. For example, plan to stream every weekday after work - and on Saturdays from 10am. (Save Sundays for friends and family.) Decide on how long you can comfortably stream for and set a fixed finish time.
Stay with your schedule. Go live on time and stop when you planned to stop. If you stream too long, you are simply going to tire yourself out - or dehydrate. Remember quality is always better than quantity.
Hint: Use the Twitch schedule tab in your Channel Page setup to immortalise your streaming times.
4.4 Find your USP
You’re USP or ‘Unique Selling Proposition’ is one of the most important ways that you can stand out from the crowd. According to Breakthrough Marketing Secrets, your USP It makes it easier for you viewers to choose you over the competition. It goes inside their minds and positions you as top choice. Also, regularly using your USP reminds your viewers about you. And it helps you to remember where you need to focus your energy. Consider carefully how to stream live on Twitch: in a different or entertaining manner that will attract viewers to you.
You might be using props; like a disguise, a wig, a painting or even a fluffy toy. Perhaps you juggle or paint? If you’re cooking - what sort of kitchen are you going to present to viewers: how do you want it to look? You might add a different background to your screen. If you’re a gamer, hold events related to the games you play ; such as a tournament in Apex or Valorant: tournaments are always a winner with viewers!
4.5 Be Authentic
“Everyone gets the viewers they deserve”: as the saying goes on Twitch. Our advice to you is: BE YOURSELF! There is no-one more you than you! Your success in the ‘Shark Tank’ will boil down to your own authenticity. All the visual refinement , planned out USP, great DJ or gaming skills won’t help if the viewers don’t enjoy the way you interact and communicate.
Remember that also, that no matter how you are, how you act and behave, there will always be enough people out there who’ll genuinely like you.
4.6 Interact with your viewers!
The OWN3D team notice that new streamers often underestimate how important it is to communicate with their viewers. You also need to set rules and enforce them consistently. Otherwise, your chat culture might quickly slip through your fingers. Keep control of the tone and topics in your chat. You can build up a wonderful conversation with your viewers if you do it right.
Always greet new viewers when they join the chat. Some usernames are complicated to pronounce, or just random strings of words and numbers, If so, do not attempt ta say them out loud, or at least use an abbreviated form of the name if you do. They could also be what are termed ‘bait names’ deliberately designed to trip you up.
Make sure to keep your chat alive with new and interesting topics. Anecdotes or stories about your life are always welcome, In the beginning this is important while you only have a few viewers. When there are followers you will notice that the chat becomes more independent. At some point you won’t be able to respond to every chat message. This is when your mods can step in to help. No reaction is not an option. It will make you seem distant and aloof.
Explore ways to increase your interaction with viewers: for example by running polls in the chat or gifting subscriptions to viewers so they can use your emotes.
4.7 Add Alerts
Like overlays, alerts help you spice up your stream. Alerts are visible in the stream and can be used to let all viewers know when someone follows you, buys a subscription to your channel, or gifts a ‘bit’ to another member of the community. This encourages other viewers to do the same, while increasing the overall entertainment value.
OWN3D.tv has an impressive selection of alert packages. Some are static and some are animated to grab even more of your viewers attention. Think about adding sound effects to your alerts to make them twice as impressive!
Don’t hesitate to contact us for any help setting up your OWN3D panels, overlays, alerts or templates. We are always here to assist you until you get it working.
4.8 Using Twitch Extensions
There are many great extensions that you can make use of on Twitch. For an overview: Login to your Twitch account then click on your circular profile icon at your top right screen. Select ‘Creator Dashboard’ from the dropdown menu. Once you’re in your Creator Dashboard, click on ‘Extensions’. You will find extensions for gaming, merchandise, for schedules and countdowns, for loyalty and recognition, quiz kits for games, stickers and emotes, to display your social media feeds and for trackers for statistics and analytics of your stream.
4.9 Let the Music Play!
Music will certainly enhance any stream. But be warned: In the Shark Tank, little fishes are only allowed to play music owned by yourselves - or licensed to you in person. That means you do need to have formal permission from the person/body that owns the music, before you can play it live on air. It’s totally okay to sing your own songs or play your own instrument or recording over the waves - as long as your content remains original and free of any hateful, racist, sexually explicit or otherwise unacceptable language.
You must understand that purchasing a CD or a Vinyl record does not give you licence to broadcast the content. Also, copyright infringement will be detected by Twitch whether it is immersed in a mix of music, or standing alone as a single track.
Any music that isn’t authorised to you will be detected by Twitch’s stream algorithms. If you violate this you may be subject to a Take Down Notification from the music rights holders and Twitch may take action against you according to their Community Guidelines.
OWN3D offers their clients a FREE MUSIC STREAMING CHANNEL with more than 200 licensed tracks. This is your best solution to beat copyright infringement issues and still enjoy the music.
4.10 Provide emotes to your viewers
Pictures are often worth a thousand words. Viewers often use emotes instead of text to show their emotional reaction. There is a reason why they are extremely popular and often referenced outside of Twitch as well. Channel owners with Affiliate or Partner status on Twitch can even upload custom emotes and offer them to their followers and subscribers as a reward. Subscribers can then use their emotes anywhere on Twitch in every chat to show they're subscribed to you: it's a great tool for building community loyalty.
You don't have to be an Affiliate or Partner to feature your own emotes in your chat. You can upload and provide your own channel emotes via the BetterTTV or FrankerFaceZ Twitch extensions. However, keep in mind that only those viewers will be able to see and use the emotes in your chat who have also enabled the extensions, so this doesn’t exactly replace the “official” Twitch emotes.
5 Top Hardware for Twitch Streaming
5.1 Console or Computer
A good gaming console like Xbox or Playstation will have everything needed to stream already built in. Similarly, a basic gaming PC such as theASUS ROG Strix Scar II Gaming Laptop, 15.6” will also suit your Twitch streaming needs.
If you are using a PC or a Mac, your hardware must meet certain minimum requirements, especially your RAM. This is even more important if you plan to game and stream at the same time. You will need to be sure your CPU has sufficient processing power to be able to do both encoding tasks simultaneously.
PC CPU: A minimum requirement is an Intel I5-4670 processor or it’s AMD equivalent such as AMD Ryzen. It should have at least 8GB of RAM and and minimum of 4 cores. A 6-core CPU is your best bet to make sure you computer can encode the audio / video channels while simultaneously running a game. We recommend that you double up on your RAM to increase your capabilities.
PC: Graphics card (GPU): The right graphics card for your stream will depend on the requirements of the games you play. You do need to have at least 4 GB of internal memory. If you have a slim CPU of only 4 cores, then invest in a stronger GPU. It can take over the encoding. A more powerful model will prevent frame rate drops. Own3D recommends the Nvidia GTX 1650 Super ( or it’s AMD counterpart: Radeon RX 5600) or RTX 2060 Super ( or the AMD counterpart: RX 5700), all with 8 GB of RAM.
If you plan to build your own PC then look at Corsair or CaseKing for your hardware and streaming components. Remember, a lot of processing will produce a significant amount of heating - so you will need proper fans and casing.
On a Mac: The Twitch Studio Mac application needs 10.14: Mojave IOS or upwards to run. A newer generation Mac with minimum of 8 GB of RAM for streaming is highly recommended. Especially if you’re planning to stream games simultaneously. A MacBook Pro 13’ Gen i5 or later models will all be very capable of encoding your data smoothly and without fluctuations.
Note that if you’re running a Mac, you will need to purchase an extra piece of hardware call a Hub Adaptor. This gives you the extra USB ports to connect your external hardware such as mic, camera, speakers etc. It also should have an ethernet port , so that you are not reliant on wifi. Your Hub Adaptor should also have an HDMI port and a slot for a graphics card.
5.2 Connect a Cable to improve Speed
We highly recommend that you connect to your internet via a cable. This is a more secure method than connecting via wifi. It also ensure you will have fewer frame-rate drops. The frame rate determines how many images are generated over time. Smooth Twitch streaming demands a family high frame rate of about 60 frames per second (fps). Ideally you want as high a resolution as possible. And, a continuous non-glitching video & audio stream.
Eventually, you should be able to achieve a high resolution of 1080 pixels with a frame rate of 60 fps. But, at beginner level on Twitch you’re limited to 720p until such time as you level up to Affiliate and then Partner status.
REFER TO THE THE TABLE BELOW FOR SUITABLE SETTINGS:
Resolution / FPS | Bitrate | Upload |
720 p / 60fps | 5000 kbps | 3000 kbps |
1080 p / 60 fps | 6000 kbps | 4500 kbps |
5.3 Microphone & Camera
Every professional setup is equipped with a microphone and a camera. Seeing and hearing are the essential components of streaming. As a result, you should make sure that these peripherals are of a certain quality. But that doesn’t mean you have to put a lot of money on the table. You can find a starter kit for under 100 Euros.
You can find the best components in our hardware guides:
5.4 Pro Accessories
The range and choice of extra hardware options and accessories is almost infinite! There is much more that you can do improve your look on Twitch. Here we consider some basic extra options that will give your stream a professional edge.
5.4.1 Lights
Lighting is important! If you are streaming indoors, in any low light conditions, at night , or with a green screen, then you will definitely need extra lighting. Otherwise, your viewers won't see you clearly. Furthermore, without good lighting, your stream might take on a strange colour temperature. This may ultimately frustrate your audience, which is something you do not want to happen!
SOFTBOX LIGHT + STAND: A SoftBox light is just what it says it is : a box with an LED bulb inside it, covered by a thin film of material that diffuses the light around you. They soften the shadows and create a pleasant ambient fill light. Softboxes come in a variety of sizes. Many have the option to change the LED setting from ‘Harsh White’ to ‘Warm White’ Light. They do tend to be rather bulky, (which may be a bit of a disadvantage0. And, they are better placed behind you to create ‘FILL LIGHT’:
DESKTOP LIGHT: You also need what is known as KEY Light, which is your primary light source and should be located behind the camera. For this a desktop light such as a RING LIGHT is the best accessory to clip on the back of your monitor screen.
5.4.2 Using a Green Screen
A green screen lets you drop any background image (or visual animated effect) behind you while you are streaming. It really is a total game-changer in terms of presentation.We highly recommend that you use one, whether your are a gamer or a DJ or simply a ‘just chatting’-stream host A green screen will go a long way to make your stream look fantastic. Check out this great selection.
Consider buying a fairly high quality screen that you can roll up and tuck away when its not being used. Also consider a washable and anti-wrinkle screen so that you can keep it in perfect condition. An important rule while using green screens is : Don’t wear anything green - or that part of your anatomy will disappear and become part of the background too. You don’t want to look hilarious to your viewers (or perhaps you do? Lol ).
5.4.3 Get an Elgato Stream Deck
Elgato’s Stream Deck has according to the masters themselves: “15 LCD keys which you can program to launch unlimited actions. This eliminates the need to map and memorise keyboard shortcuts. One-touch, tactile operation lets you switch scenes, launch media, adjust audio and more, while visual feedback confirms your every command.”
From our own live streaming experience at OWN3D.tv, we can assure you that this elegant device makes streaming much more simple! When you are deep in the Shark Tank, keyboard commands and scene switches become trickier, and even quite impossible to perform, because you are completely occupied with your presentation and busy communicating with the chat stream - and perhaps only using one device .
OUR HINT: If you can’t presently afford to purchase of the 3 Elgato models, consider downloading a STREAM DECK application on your phone. Stream Mentor suggests some great digital deck alternatives.
6 Streaming on Multiple Platforms
Particularly as a streaming beginner, it can be helpful to be present on several platforms simultaneously. This way you can increase your range and the number of your followers. This sounds logical at first, but it is hardly possible to realize it with Twitch, because there is a clause in the terms and conditions that prohibits simultaneous streaming on Twitch and other platforms as soon as you are an affiliate or partner of Twitch.
Due to the fact that the affiliate status is achieved relatively quickly and easily, you may at best forget about it right away, as it brings more effort than benefit. Should you still want to try streaming on multiple platforms at the beginning, there is special multistream software available to help you put your plan into action. The best known is the free software restream.io.
7 How to Stream on Twitch with Friends
First, you will need to achieve you goal to become an official Twitch Partner. Then you get the fabulous opportunity to add up to 3 friends onto your stream with something Twitch calls: ‘Squad streaming’.
Squad streaming conveniently allows you to combine all three participator’s screens onto one stream. This works out super well for your tournaments and battle matches
How to start a Squad Stream on Twitch:
1. Become a Twitch Partner! (Yes!)
2. Click on the "Squad Stream" widget in your dashboard.
3. Click on "Add a Channel" and enter the name of your friends you want to add.
4. Click "Start Squad Stream" once your friends have accepted the invitation.
8 How to Start Streaming on Twitch: FAQs
Can I save my Twitch stream?
Yes of course! You can download your stream broadcast and save a file of it on your hard drive, even if you don’t keep them in Twitch’s archives.
How to do it:
Click your profile picture in the top right corner of Twitch’s homepage. Select “Creator Dashboard” from the dropdown menu that appears.
Once you’re there, you can click the “Content” drop down on the left side of your screen and select “Video Producer” to open up all the videos and past broadcasts for your channel.
Select the broadcast that you want to save. A video preview will pop out.
At the top of that preview you’ll see a list of options.
Click the ‘Download’ option. And off you go!
Why does my stream lag on Twitch?
Firstly check with other streamers. It’s often because Twitch is simply ‘twitching’ - or slow due to a general issue. Check also that your transmission OUTPUTS are not set to high. This often just requires a bit of playing around with your output settings within the broadcast software that you are using.
Also check that you are not using too many devices over your internet at the same time. A lot of usage can definitely cause a delay in the frame rate. Also make sure you’ve got your cable directly connected to your device, rather than wifi connection.
It might also just be down to the type of hardware you use - better gaming consoles or more powerful computers will deliver better quality streams. This can depend on your RAM or your gaming card capability or. simply the age of your hardware: the newer the better.
Why Use Twitch above any other platform?
According to FastCompany, Twitch is increasingly a mainstream platform for “multiplayer” entertainment. Like no other platform, Twitch integrates tools that were developed for people to watch games together i.e. Live Chat and letting the viewers take control of the online action, into an extremely powerful platform that rivals no other. Twitch has dedicated subcategories for chatting, health, cooking, social eating, music, gaming, arts and the performing arts, features that no other platform can truly boast.
It also offers a huge variety of broadcasting software and other extensions that make a streamers experience uniquely exciting and original. The other factor is the Twitch community, which means that you get to become a part of a group of like-minded individuals who are all dedicated to building and growing the experience together with you. It seriously feels like the family you never had before.
What Content or Game is best to Stream On Twitch?
The secret here is to do what you enjoy. Follow your passion on Twitch; play your favourite game or favourite music - or cook your favourite food. If you are enjoying yourself, and you believe in what you do, you can’t go wrong. Don’t aim higher than you can reach, stick to the middle ground where you are comfy, and your audience will feel comfy too.
Who can Stream on Twitch?
Anyone over the age of 18 can stream. If you are 13 years plus - you are going to need parental permission. This includes watching channels as well as presenting them.
What’s the best time to Stream on Twitch?
Anytime that’s good for you will be good for your potential viewers. It’s always sunset or sunrise somewhere on this planet. With a massive global platform of 9.2 million viewers, you are always going to catch a large percentage of your audience at the right time.
Stick to the schedule that you decided on and posted to your channel. Make sure those times are comfortable for you - and your viewers will fall into place. Consider extra streams at Christmas or on special Holidays or National Festivals - you may be able to pick up extra viewers at those times.
StreamersPlaybook recommends streaming when there are fewer channels: which is between 12 pm midnight and 9 am PST according to their collected data and statistics.
“As a new streamer, you should focus on streaming during nights, early mornings, and weekends. Specifically, streaming between midnight and 9 in the morning will give your channel the greatest chance of being noticed. This is especially necessary during the weekend when Twitch sees a major spike in viewership “
If you’re on holiday then perhaps aim for when most viewers in your area are online - at 5pm after arriving home from work.
Can I stream Twitch and YouTube at the same time?
As long as you have not yet signed up for Twitch’s Affiliate or Partnership Programs, you are free to stream on Twitch and other platforms simultaneously.
If you are a Twitch Affiliate or Partner, then be aware that you need to leave a full 24 hour gap after streaming before uploading or using your content on other platforms.


